BenQ Mp611c Dlp Users Manual
Here you can view all the pages of manual BenQ Mp611c Dlp Users Manual. The BenQ manuals for Projector are available online for free. You can easily download all the documents as PDF.
Page 31
Operation 27
Auto-adjusting the image
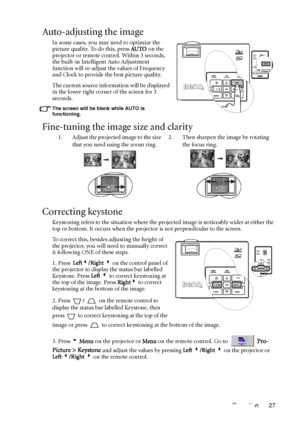
In some cases, you may need to optimize the
picture quality. To do this, press AU TO on the
projector or remote control. Within 3 seconds,
the built-in Intelligent Auto Adjustment
function will re-adjust the values of Frequency
and Clock to provide the best picture quality.
The current source information will be displayed
in the lower right corner of the screen for 3
seconds.
The screen will be blank while AUTO is
functioning.
Fine-tuning the image size and...
Page 32
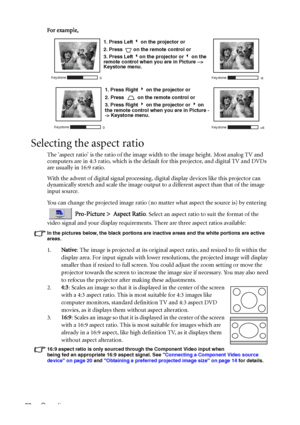
Operation 28For example,
Selecting the aspect ratio
The aspect ratio is the ratio of the image width to the image height. Most analog TV and
computers are in 4:3 ratio, which is the default for this projector, and digital TV and DVDs
are usually in 16:9 ratio.
With the advent of digital signal processing, digital display devices like this projector can
dynamically stretch and scale the image output to a different aspect than that of the image
input source.
You can change the projected image ratio...
Page 33
Operation 29
Selecting a picture mode
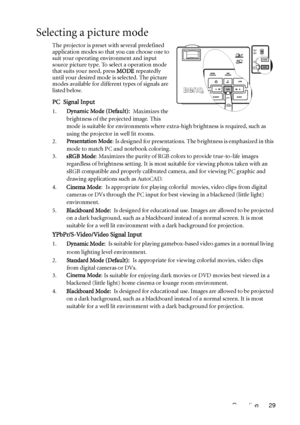
The projector is preset with several predefined
application modes so that you can choose one to
suit your operating environment and input
source picture type. To select a operation mode
that suits your need, press MODE repeatedly
until your desired mode is selected. The picture
modes available for different types of signals are
listed below.
PC Signal Input
1.Dynamic Mode (Default): Maximizes the
brightness of the projected image. This
mode is suitable for...
Page 34
Operation 30
Hiding the image
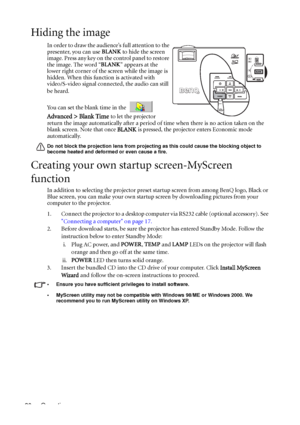
In order to draw the audience’s full attention to the
presenter, you can use BLANK to hide the screen
image. Press any key on the control panel to restore
the image. The word “BLANK” appears at the
lower right corner of the screen while the image is
hidden. When this function is activated with
video/S-video signal connected, the audio can still
be heard.
You can set the blank time in the

Advanced > Blank Time
to let the projector
return the image automatically...
Page 35
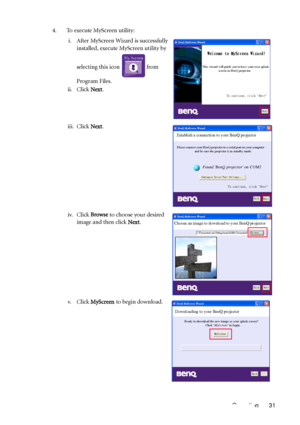
Operation 31 4. To execute MyScreen utility:
i. After MyScreen Wizard is successfully
installed, execute MyScreen utility by
selecting this icon   from
Program Files.
ii. Click Next.
iii. Click Next.
iv. Click Browse to choose your desired
image and then click Next.
v. Click MyScreen to begin download.
Welcome to MyScreen Wizard!
This wizard will guide you to have your own splash
          screen in BenQ projector.
To continue, click "
Next"
Next
Establish a connection to your BenQ projector...
Page 36
Operation 32
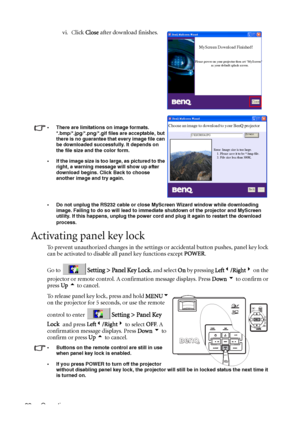
• Do not unplug the RS232 cable or close MyScreen Wizard window while downloading
image. Failing to do so will lead to immediate shutdown of the projector and MyScreen
utility. If this happens, unplug the power cord and plug it again to restart the download
process.
Activating panel key lock
To prevent unauthorized changes in the settings or accidental button pushes, panel key lock
can be activated to disable all panel key functions except POWER.
Go to
Setting > Panel Key Lock, and...
Page 37
Operation 33
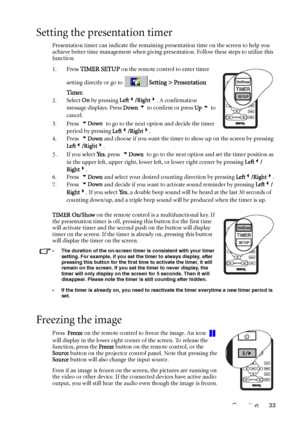
Setting the presentation timer
Presentation timer can indicate the remaining presentation time on the screen to help you
achieve better time management when giving presentation. Follow these steps to utilize this
function:
1. Press
TIMER SETUP on the remote control to enter timer
setting directly or go to
Setting > Presentation
Timer.
2. Select On by pressing Left3/Right4. A confirmation
message displays. Press Down 6 to confirm or press Up 5 to
cancel.
3. Press  6Down to go to the...
Page 38
Operation 34
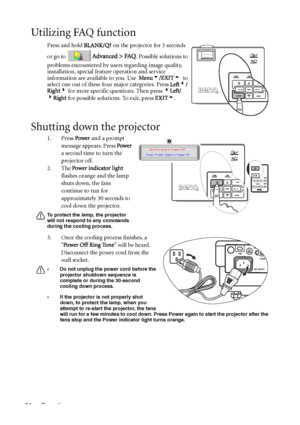
Utilizing FAQ function
Press and hold BLANK/Q? on the projector for 3 seconds
or go to
 Advanced > FAQ. Possible solutions to
problems encountered by users regarding image quality,
installation, special feature operation and service
information are available to you. Use  Menu6/EXIT5  to
select one out of these four major categories. Press Left3/
Right4 for more specific questions. Then press 3Left/
4Right for possible solutions. To exit, press EXIT5.
Shutting down the projector
1....
Page 39
Operation 35
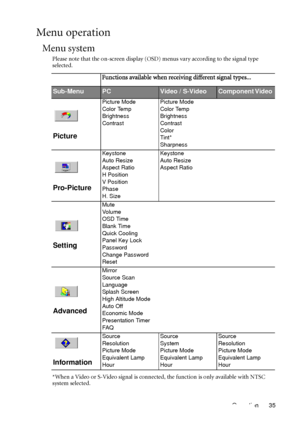
Menu operation
Menu system
Please note that the on-screen display (OSD) menus vary according to the signal type
selected.
*When a Video or S-Video signal is connected, the function is only available with NTSC
system selected.
Functions available when receiving different signal types...
Sub-MenuPCVideo / S-VideoComponent Video
Picture
Picture Mode
Color Temp
Brightness
ContrastPicture Mode
Color Temp
Brightness
Contrast
Color
Tint*
Sharpness
Pro-Picture
Keystone
Auto Resize
Aspect Ratio
H...
Page 40
Operation 36
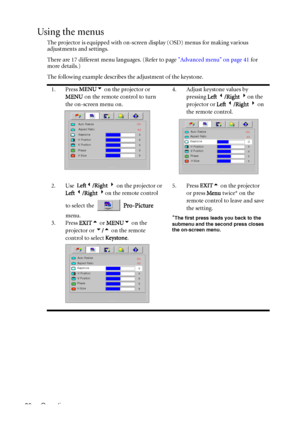
Using the menus
The projector is equipped with on-screen display (OSD) menus for making various
adjustments and settings.
There are 17 different menu languages. (Refer to page Advanced menu on page 41 for
more details.)
The following example describes the adjustment of the keystone.
1. Press MENU6 on the projector or
MENU on the remote control to turn
the on-screen menu on.4. Adjust keystone values by
pressing Left 3/Right 4on the
projector or Left 3/Right 4 on
the remote control.
2....
