Home
>
Black and Decker
>
Food Processor
>
Black and Decker Performance Food Processor FP6010 User Manual
Black and Decker Performance Food Processor FP6010 User Manual
Here you can view all the pages of manual Black and Decker Performance Food Processor FP6010 User Manual. The Black and Decker manuals for Food Processor are available online for free. You can easily download all the documents as PDF.
Page 1
\037\036

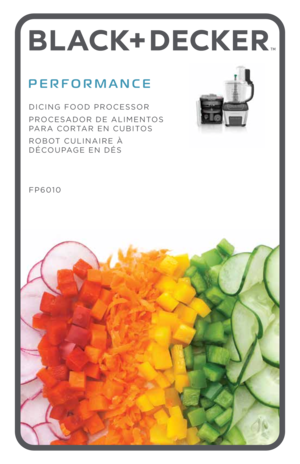
DICING FOOD PROCESSOR
PROCESADOR DE ALIMENTOS
PARA CORTAR EN CUBITOS
ROBOT CULINAIRE À
D\fCOUPAGE EN D\fS

FP6010
Page 2
\b
Should you have any questions or concerns with your new product,
please call our Customer Service Line at 1-800-\b31-9786 (US and
Canada).  Please do not return to the store.
Si usted tiene alguna inquietud o pregunta con su producto, por
favor llame a nuestra línea de servicio al cliente una atención
inmediata 1-800-\b31-9786 (EE.UU/Canadá)  01-800-714-\b503
(México). No devuela a la tienda.
Si vous avez des questions ou des préoccupations à propos de
votre nouveau produit, veuillez communiquer...
Page 3
3
CONTENTS
IMPORTANT SAFEGUARDS..................\À..................\À....... 4
GETTING TO KNOW YOUR PERFORMANCE FOOD PROCESSOR .............5
GETTING STARTED ..................\À..................\À............. 6
USING YOUR FOOD PROCESSOR ..................\À..................\À.. 6
USING THE FEED CHUTE AND PUSHERS ..................\À..............7
USING THE SPEED CONTROLS ..................\À..................\À.... 7
USING THE DICING DISK ..................\À..................\À......... 8
HELPFUL...
Page 4
4
• Read and save all instructions.
•  Unit has a motor protection system. If the largest food
pusher in the feed chute comes out of the food processor
lid, the machine will shut off.
•  To protect against risk of electrical shock, do not
 put food processor base, cord or plug in water or other
liquid.
•  Close supervision is necessary when any appliance is used
by or near children.
•  Unplug from outlet when not in use, before putting on and
taking off parts and before cleaning.
•  Avoid...
Page 5
5
GETTING TO KNOW YOUR
PERFOR\fANCE
FOOD PROCESSOR
1. Motor base
\b.  Suction Cup Feet
3.  Power Cord (not shown)
4.  Digital Control Panel
5.  Large 11-cup workbowl
  (Part # FP6010-01)
6.  Center Post
7.   Small 4-cup workbowl

  (Part # FP6010-0\b)
8.  Lid with Wide Mouth Feed Chute
  (Part # FP6010-03)
9.  Multifunctional 3 piece food pusher
  (small: part # FP6010-04;   medium part # FP6010-05;   large: part # FP6010-06)
10.  Externally adjustable slicing control
11.  Removable blade...
Page 6
6
GETTING STARTED
• Remove all packing material, any stickers, and the plastic band around the
power plug.
•   Remove and save literature.
•   Please visit www.prodprotect.com/applica to register your warranty.
•   Wash all removable parts as instructed in CARE AND CLE\ÀANING
section of this ma\Ànual.
•  CAUTION: Handle blad\Àes and disks very carefully. They are very sharp.
•  Select a level dry countertop where the appliance is to be used allowing
air space on all sides to provide proper...
Page 7
7
4. Attach your selected blade or disk t\Ào the center post
in the bottom of the large workbowl (instructions for
individual disks/bl\Àades follow in this manual).\À
5.  Place the workbowl lid on top of the workbowl,
aligning the tabs \Àand locking it int\Ào place by turning
counterclockwise. The workbowl lid is locked when
it clicks firmly in\Àto place. The lid will always and
only lock when the\À feed chute is aligned with \Àthe
workbowl handle. (B)
Note:  Be sure to lock the workbowl in place...
Page 8
8
food pusher pops ou\Àt and/or the lid and workbowl are not
properly locked in place.
The controls are located on the front of the base. See
the speed chart be\Àlow for food processing and speed
recommendations. Various speeds are used for chopping,
mixing, dicing, sl\Àicing and shredding. When these\À functions
are selected the processor will run continuously until \Àthe
PULSE|OFF button is pressed to stop.  (E)1.  Plug in the applia\Ànce to turn it on.
\b.  Select low, medium or high s\Àpeed...
Page 9
9
workbowl handle (facing right) into the workbowl.
Dicing disk can on\Àly be properly installed when grid
faces the processor handle.
5.  Push the dicing dis\Àk down, making sure it is secure in
the work bowl.
6.  Grasp dicing blade b\Ày the center using the finger\À
grips. Insert the \Àcurved plastic edge under the\À outer
edge of the dicing\À disk. (H) Place center of blade
down onto the top of the visible d\Àicing shaft in the\À
center of the dicing d\Àisk. You may need to rotate the center...
Page 10
10
HELPFUL TIPS WHEN \ÀUSING
THE DICING DISK
•  Operate the dicing disk \Àon LOW speed.
•  It is recommended to stop dicing when workbowl is 60% full.
•   Blade must be removed from the top of the disk bef\Àore using the cleano\Àut
tool.
•  Cut the ends of food to be diced off for most uniform dice.
•  For small and soft foods, such as strawberries, use the smallest feed chute
for best results.
•  When dicing multip\Àle ingredients, dice softer foods first and end with
hardest food.
•  When dicing...


