Acer Aspire 5534 Service Guide
Here you can view all the pages of manual Acer Aspire 5534 Service Guide. The Acer manuals for Notebook are available online for free. You can easily download all the documents as PDF.
Page 121
Chapter 3111
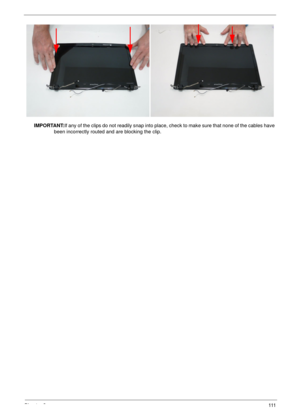
IMPORTANT:If any of the clips do not readily snap into place, check to make sure that none of the cables have
been incorrectly routed and are blocking the clip.
Page 122
11 2Chapter 3
Main Unit Reassembly Process
Replacing the LCD Module
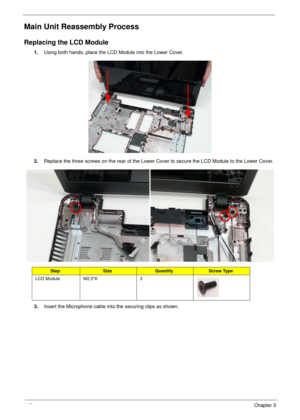
1.Using both hands, place the LCD Module into the Lower Cover.
2.Replace the three screws on the rear of the Lower Cover to secure the LCD Module to the Lower Cover.
3.Insert the Microphone cable into the securing clips as shown.
StepSizeQuantityScrew Type
LCD Module  M2.5*6 3
Page 123
Chapter 311 3
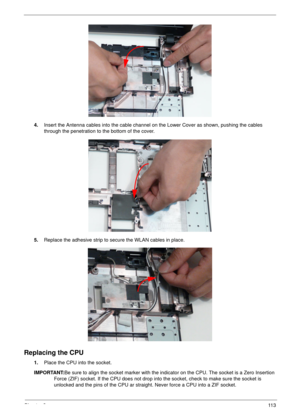
4.Insert the Antenna cables into the cable channel on the Lower Cover as shown, pushing the cables
through the penetration to the bottom of the cover.
5.Replace the adhesive strip to secure the WLAN cables in place.
Replacing the CPU
1.Place the CPU into the socket.
IMPORTANT:Be sure to align the socket marker with the indicator on the CPU. The socket is a Zero Insertion
Force (ZIF) socket. If the CPU does not drop into the socket, check to make sure the socket is
unlocked and the pins...
Page 124
11 4Chapter 3
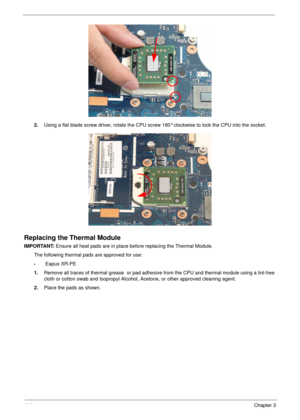
2.Using a flat blade screw driver, rotate the CPU screw 180° clockwise to lock the CPU into the socket.
Replacing the Thermal Module
IMPORTANT: Ensure all heat pads are in place before replacing the Thermal Module.
The following thermal pads are approved for use:
• Eapus XR-PE
1.Remove all traces of thermal grease  or pad adhesive from the CPU and thermal module using a lint-free
cloth or cotton swab and Isopropyl Alcohol, Acetone, or other approved cleaning agent.
2.Place the pads as...
Page 125
Chapter 311 5
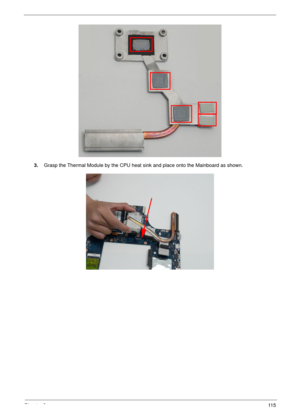
3.Grasp the Thermal Module by the CPU heat sink and place onto the Mainboard as shown.
Page 126
11 6Chapter 3
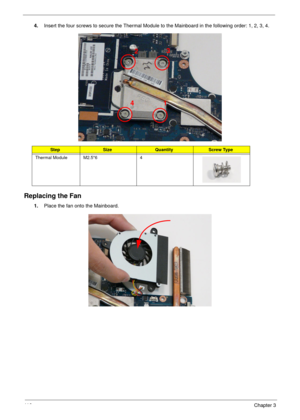
4.Insert the four screws to secure the Thermal Module to the Mainboard in the following order: 1, 2, 3, 4.
Replacing the Fan
1.Place the fan onto the Mainboard.
StepSizeQuantityScrew Type
Thermal Module M2.5*6 4
1 23
4
Page 127
Chapter 311 7
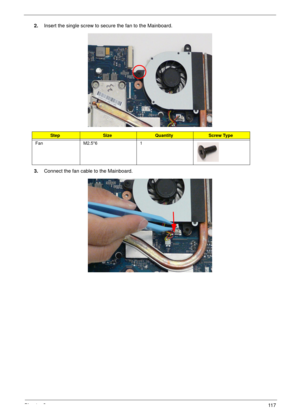
2.Insert the single screw to secure the fan to the Mainboard.
3.Connect the fan cable to the Mainboard.
StepSizeQuantityScrew Type
Fan M2.5*6 1
Page 128
11 8Chapter 3
Replacing the Mainboard
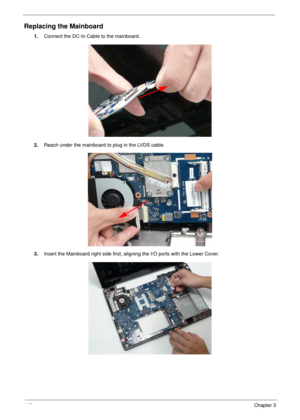
1.Connect the DC-In Cable to the mainboard.
2.Reach under the mainboard to plug in the LVDS cable.
3.Insert the Mainboard right side first, aligning the I/O ports with the Lower Cover.
Page 129
Chapter 311 9
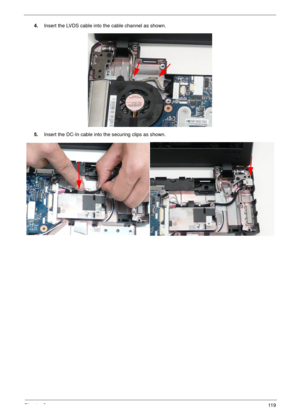
4.Insert the LVDS cable into the cable channel as shown.
5.Insert the DC-In cable into the securing clips as shown.
Page 130
120Chapter 3
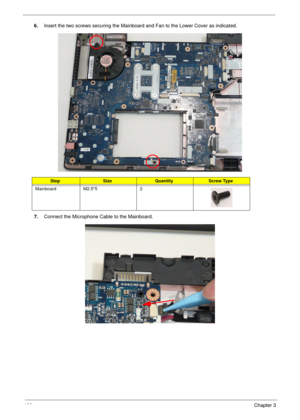
6.Insert the two screws securing the Mainboard and Fan to the Lower Cover as indicated.
7.Connect the Microphone Cable to the Mainboard.
StepSizeQuantityScrew Type
Mainboard M2.5*5 2
