Home
>
Black and Decker
>
Food Processor
>
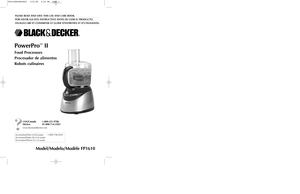
Black and Decker PowerPro II Food Processor FP1610S User Manual
Black and Decker PowerPro II Food Processor FP1610S User Manual
Here you can view all the pages of manual Black and Decker PowerPro II Food Processor FP1610S User Manual. The Black and Decker manuals for Food Processor are available online for free. You can easily download all the documents as PDF.
Page 1
Model/Modelo/Modèle FP1610
USA/Canada 1-800-231-9786
Mexico 01-800-714-2503www.blackanddecker.com
Accessories/Parts
(USA/Canada)
1-800-738-0245
Accesorios/Partes
(EE.UU/Canadá)
Accessoires/Pièces
(É.-U./Canada)
PLEASE READ AND SAVE THIS USE AND CARE BOOK.POR FAVOR LEA ESTE INSTRUCTIVO ANTES DE USAR EL PRODUCTO.VEUILLEZ LIRE ET CONSERVER CE GUIDE D’ENTRETIEN ET D’UTILISATION.PowerPro
™
II
Food Processors
Procesador de alimentos
Robots culinaires
FP1610SPub600021  3/31/05  2:14 PM  Page 1
Page 2
2
1
When using electrical appliances, basic safety precautions should always
be followed, including the following.❑
Read all instructions.
❑
To protect against risk of electrical shock, do not put base, cord, or plug
in water or other liquid.
❑
Close supervision is necessary when any appliance is used by or near
children.
❑
Unplug from outlet when not in use, before putting on or taking off
parts, and before cleaning.
❑
Avoid contacting moving parts.
❑
Do not operate any appliance with a damaged cord or...
Page 3
4
3
†1.Food pusher (Part # MP12-3-102 )
†2.Food chute/cover
(Part # MP12-2-600)
†3.Slice/Shred disc (Part # MP12-2-500)
†4.Disc stem (Part # 210204-100)
†5.10-cup (2365 ml) container
(Part # MP12-2-200)
6. Center post
7. Control panel8. Base
†9.Dough blade
(Part # MP12-3-017)
†10. Chopping blade (Part # MP12-3-400)
†11. Extra-thin slice/Fine shred disc
(Part # 211704-100 )
†12. Storage lid (Part # 211801-002)
†Consumer replaceableProduct may vary slightly from what is illustrated.
How to UseThis product...
Page 4
6. Firmly press the HIGH or LOW speed button, then press down lightly but
firmly on food pusher.
Note:Let processor do the work. Heavy pressure will not speed up operation.
7. After processing food, press the control to OFF. Allow disc to stop rotating.
Twist food chute/cover clockwise to UNLOCK and remove.
8. Carefully pull slice/shred disc off the stem, remove stem, unlock container by
turning it clockwise, and lift it off.
CHOPPING BLADE (E)
1. Place container over center post in base with handle at...
Page 5
8
7
CHOPPING GUIDEFOOD AMOUNT COMMENTS
BABY FOOD  Up to 4 cups Add up to 4 cups (1000 ml)
(1000 ml) cooked vegetables and/or meat to
container, along with 1/4 cup
(60 ml) liquid per cup of solid
food, process continuously
to desired fineness.
BREAD CRUMBS Up to 5 slices Cut either fresh or dry bread slices
into 1 1/2-2 inch pieces
(3.75 & 5 cm). Add to container and process to fine crumbs.
COOKIE/CRACKER Up to 5 cups Use for crumbing graham crackers,
CRUMBS (1250 ml) chocolate or vanilla wafers....
Page 6
10
9
FOOD COMMENTS
CHEESE, Cheese must be chilled in
MOZZARELLA freezer for 30 minutes prior
to shredding. Cut to fit chute.
Use light pressure.
POTATOES Cut potatoes to fit chute.
ZUCCHINI Cut to fit chute, either
lengthwise or horizontally.
YELLOW SQUASH Use light pressure.SLICING GUIDEFOOD COMMENTS
APPLE  Quarter and stack horizontally
in chute. Use firm pressure.
CABBAGE  For coarsely shredded results, use
slicing side of disc. Cut
into pieces to fit chute.
Empty container as cabbage reaches...
Page 7
12
11
1. Sprinkle yeast over water; add sugar and let stand until yeast is dissolved,
about 5 minutes.
2. Position dough blade in container of processor. Add 3 cups (750 ml) flour, salt
and olive oil. With processor running, gradually add yeast mixture down food
chute. Add additional flour to make a soft dough.  Continue processing dough
for 1 to 1-1/2 minutes. Stop and let dough rest for 10 minutes.
3. On lightly floured board, knead several times and form into ball. Place in
greased bowl, turning to...
Page 8
14
13 ENCHUFE POLARIZADO
Este aparato cuenta con un enchufe polarizado (un contacto es más ancho que el
otro). A fin de reducir el riesgo de un choque eléctrico, este enchufe encaja en una
toma de corriente polarizada en un solo sentido.  Si el enchufe no entra en la toma
de corriente, inviértalo y si aun así no encaja, consulte con un electricista. Por favor
no trate de alterar esta medida de seguridad.TORNILLO DE SEGURIDADAdvertencia:Este aparato cuenta con un tornillo de seguridad para evitar la...
Page 9
16
15
Como usarEste aparato es solamente para uso doméstico.
•Antes del primer uso, desempaque el producto y retire el material de embalaje.
Maneje con cuidado la cuchilla de picar y los discos de rebanar/desmenuzar.
•Lave todas las piezas con excepción de la base.
Importante:Para verificación de la garantía, por favor no retire la etiqueta del cable
eléctrico.
Nota:No trate de picar hielo en este procesador de alimentos; de lo contrario puede
dañar el recipiente y hacer que la cuchilla pierda el filo....
Page 10
18
17
USO DE LA CUCHILLA DE AMASAR (G)
IMPORTANTE:Para la instalación y remoción de la cuchilla de amasar, por favor siga
las mismas instrucciones de la cuchilla de picar.
1.
La cuchilla de amasar puede ser empleada para los panes
de levadura, para la masa de la pizza o para los panecillos
de levadura que requieren un mínimo de 750 ml (3 tazas) de
harina.
Aproveche las dos recetas provistas en el este manual como guía
al preparar masa para pan o para pizza. Asegúrese de añadir el
líquido despacio ya...


