BenQ Gp2 Users Manual
Here you can view all the pages of manual BenQ Gp2 Users Manual. The BenQ manuals for Projector are available online for free. You can easily download all the documents as PDF.
Page 41
Operation41
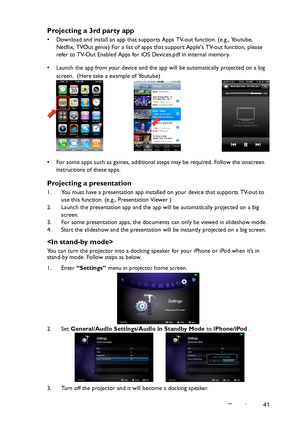
Projecting a 3rd party app
• Download and install an app that supports Apps TV-out function. (e.g., Youtube,
Netflix, TVOut genie) For a list of apps that support Apples TV-out function, please
refer to TV-Out Enabled Apps for iOS Devices.pdf in internal memory.
• Launch the app from your device and the app will be automatically projected on a big
screen.  (Here take a example of Youtube)
• For some apps such as games, additional steps may be required. Follow the onscreen
instructions of...
Page 42
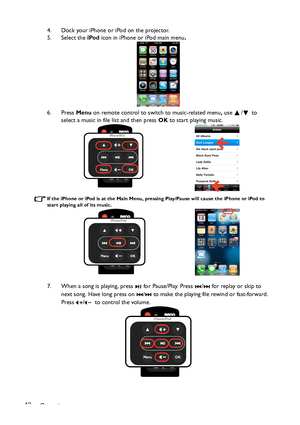
Operation 424. Dock your iPhone or iPod on the projector.
5. Select the iPod icon in iPhone or iPod main menu.
6. Press Menu on remote control to switch to music-related menu, use / to
select a music in file list and then press OK to start playing music.
If the iPhone or iPod is at the Main Menu, pressing Play/Pause will cause the iPhone or iPod to
start playing all of its music.
7. When a song is playing, press   for Pause/Play. Press  /  for replay or skip to
next song. Have long press on  /  to...
Page 43
Operation43
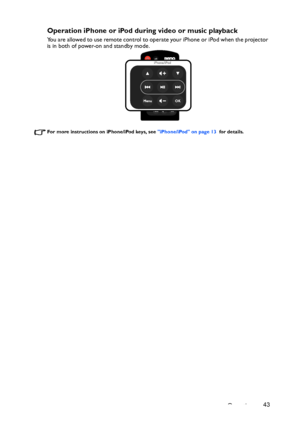
Operation iPhone or iPod during video or music playback
You are allowed to use remote control to operate your iPhone or iPod when the projector
is in both of power-on and standby mode.
For more instructions on iPhone/iPod keys, see iPhone/iPod on page 13  for details.
Downloaded From projector-manual.com BenQ Manuals
Page 44
Operation 44
Displaying images with PC and Video source
devices
You can connect your projector to a PC and various Video source devices. (e.g. HDMI,
composite video, component video) However, you need only connect the projector to an
input source device.
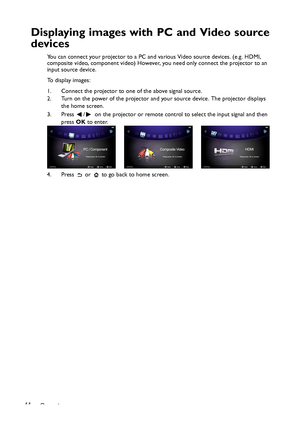
To display images:
1. Connect the projector to one of the above signal source.
2. Turn on the power of the projector and your source device. The projector displays
the home screen.
3. Press  /   on the projector or remote control to select the input...
Page 45
Operation45
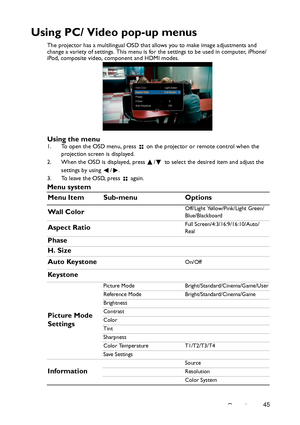
Using PC/ Video pop-up menus
The projector has a multilingual OSD that allows you to make image adjustments and
change a variety of settings. This menu is for
the settings to be used in computer, iPhone/
iPod, composite video, component and HDMI modes.
Using the menu1. To open the OSD menu, press   on the projector or remote control when the
projection screen is displayed.
2. When the OSD is displayed, press  /  to select the desired item and adjust the
settings by using  / .
3. To leave...
Page 46
Operation 46
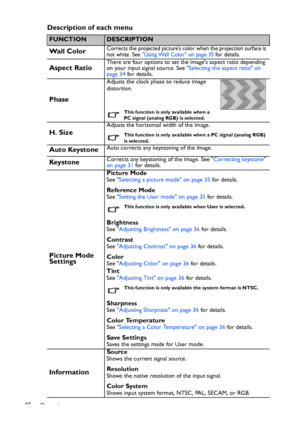
Description of each menu
FUNCTIONDESCRIPTION
Wall ColorCorrects the projected picture’s color when the projection surface is
not white. See Using Wall Color on page 35 for details.
Aspect RatioThere are four options to set the images aspect ratio depending
on your input signal source. See Selecting the aspect ratio on
page 34 for details.
Phase
Adjusts the clock phase to reduce image
distortion.
This function is only available when a
PC signal (analog RGB) is selected.
H. Size
Adjusts...
Page 47
Operation47
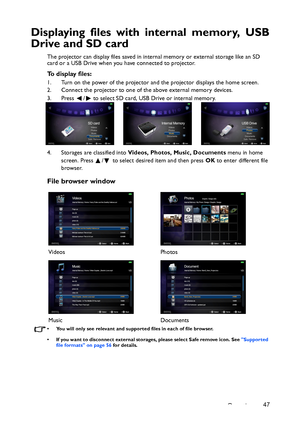
Displaying files with internal memory, USB
Drive and SD card
The projector can display files saved in internal memory or external storage like an SD
card or a USB Drive when you have connected to projector.
To display files:
1. Turn on the power of the projector and the projector displays the home screen.
2. Connect the projector to one of the above external memory devices.
3. Press  /  to select SD card, USB Drive or internal memory.
4. Storages are classified into Videos, Photos, Music,...
Page 48
Operation 48
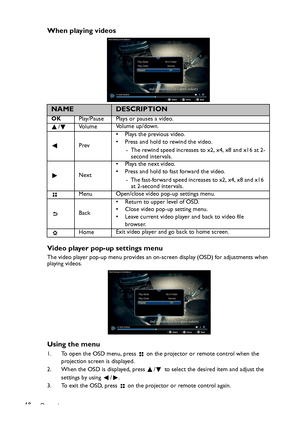
When playing videos
Video player pop-up settings menu
The video player pop-up menu provides an on-screen display (OSD) for adjustments when
playing videos.
Using the menu
1. To open the OSD menu, press   on the projector or remote control when the
projection screen is displayed.
2. When the OSD is displayed, press  /  to select the desired item and adjust the
settings by using  / .
3. To exit the OSD, press   on the projector or remote control again.
NAMEDESCRIPTION
OKPlay/Pause Plays or...
Page 49
Operation49
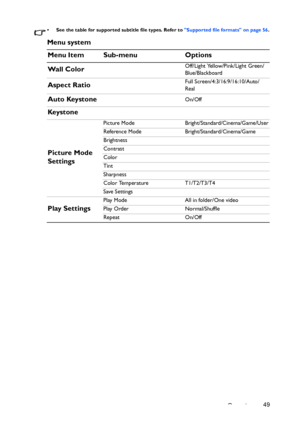
• See the table for supported subtitle file types. Refer to Supported file formats on page 56.
Menu system
Menu Item Sub-menu Options
Wall Color
Off/Light Yellow/Pink/Light Green/
Blue/Blackboard
Aspect RatioFull Screen/4:3/16:9/16:10/Auto/
Real
Auto KeystoneOn/Off
Key s t o n e
Picture Mode
Settings
Picture Mode Bright/Standard/Cinema/Game/User
Reference Mode Bright/Standard/Cinema/Game
Brightness
Contrast
Color
Tint
Sharpness
Color Temperature T1/T2/T3/T4
Save Settings
Play Settings
Play...
Page 50
Operation 50
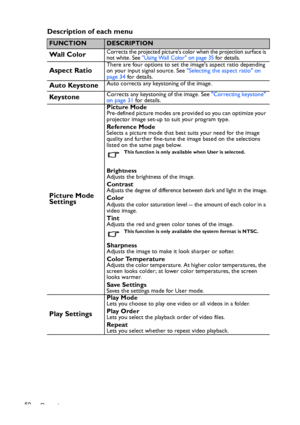
Description of each menu
FUNCTIONDESCRIPTION
Wall ColorCorrects the projected picture’s color when the projection surface is
not white. See Using Wall Color on page 35 for details.
Aspect RatioThere are four options to set the images aspect ratio depending
on your input signal source. See Selecting the aspect ratio on
page 34 for details.
Auto KeystoneAuto corrects any keystoning of the image.
Key s t o n eCorrects any keystoning of the image. See Correcting keystone
on page 31 for...
