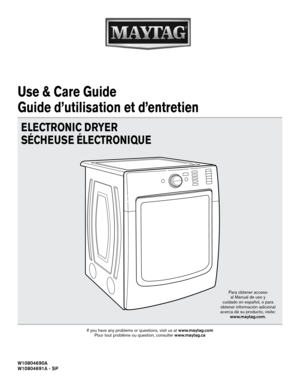
Whirlpool Electronic Dryer YMED8200FC0 User Manual
Here you can view all the pages of manual Whirlpool Electronic Dryer YMED8200FC0 User Manual. The Whirlpool manuals for Dryer are available online for free. You can easily download all the documents as PDF.
Page 1
W10804690A
W10804691A - SP
If you have any problems or questions, visit us at www.maytag.com
Pour tout problème ou question, consulter www.maytag.ca
Use & Care Guide
Guide d’utilisation et d’entretien
ELECTRONIC DRYER
SÉCHEUSE ÉLECTRONIQUE
Para obtener acceso  al Manual de uso y
cuidado en español, o para
obtener información adicional
acerca de su producto, visite:   www.maytag.com.
Page 2
2
DRYER SAFETY
TABLE OF CONTENTS
DRYER SAFETY ........................................................................\
............... 2
ACCESSORIES  ........................................................................\
............... 4
CHECK YOUR VENT SYSTEM FOR GOOD AIR FLOW ............ 5
CONTROL PANEL AND FEATURES ................................................. 6
CYCLE GUIDE ........................................................................\
.................. 8
USING YOUR DRYER...
Page 4
4
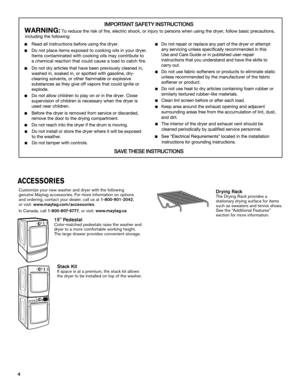
ACCESSORIES
Customize your new washer and dryer with the following
genuine Maytag accessories. For more information on options
and ordering, contact your dealer, call us at 1-800-901-2042,
or visit: www.maytag.com/accessories.
In Canada, call 1-800-807-6777, or visit: www.maytag.ca
15" PedestalColor-matched pedestals raise the washer and
dryer to a more comfortable working height.
The large drawer provides convenient storage.
Stack KitIf space is at a premium, the stack kit allows
the...
Page 5
5
CHECK YOUR VENT SYSTEM FOR GOOD AIR FLOW
Good airflow
Along with heat, dryers require good air flow to efficiently
dry laundry. Proper venting will reduce your drying times and
improve your energy savings. See Installation Instructions.
The venting system attached to the dryer plays a big role
in good air flow.
Service calls caused by improper venting are not covered by
the warranty and will be paid by the customer, regardless of
who installed the dryer.
Maintain good air flow by:
n	Cleaning...
Page 6
6
CONTROL PANEL AND FEATURES
Not all features and cycles are available on all models.
NOTE: The control panel features a sensitive surface that responds
to a light touch of your finger. To ensure your selections are registered,
touch the control panel with your finger tip, not your fingernail. When
selecting a setting or option, simply touch its name.
POWER/CANCELTouch to turn the dryer on and off. Touch to stop/cancel
a cycle at any time.
CYCLE CONTROL KNOBTurn the knob to select a cycle for...
Page 7
7
Steam Boost
Steam Boost adds steam to the end of the Heavy Duty, Bed-
ding, or Normal cycle to help smooth wrinkles. Steam Boost can
be used with High or Medium heat settings. This option adds
approximately 15 minutes to the total cycle time.
Cycle Signal
Use this to turn the signal indicating the end of a drying cycle on
or off.
NOTE: You may also turn off the tones that sound when
a feature, setting, or option is touched. Touch and hold Cycle
Signal for about one second to turn sounds on
or...
Page 8
8
CYCLE GUIDE — SENSOR CYCLES
Settings and options shown in bold are default settings for that cycle.
If settings are changed, the new settings will be remembered. If there is a power failure\
, settings will return to the default.
Not all features and cycles are available on all models.
Not all settings and options are available on each cycle.
Heavyweight items Power Dry High More 40 Wrinkle Prevent† Offers stepped drying starting
such as towels or    Normal    Reduce Static* with High heat...
Page 9
9
CYCLE GUIDE — TIMED CYCLESSettings and options shown in bold are default settings for that cycle.
If settings are changed, the new settings will be remembered (except on Rapid Dry). If \
there is a power failure, settings
will return to the default.
Not all features and cycles are available on all models.
Not all settings and options are available on each cycle.
Any load Timed Dry High 40  Wrinkle Prevent† Use to dry items to a damp level for items that do
NOTE: Select Air   Medium     not require...
Page 10
10
USING YOUR DRYER
1. Clean the lint screen
Clean the lint screen before each load. Pull the lint screen straight
up. Roll lint off the screen with your fingers. Do not rinse or wash
screen to remove lint. Wet lint is hard to remove. Push the lint
screen firmly back into place.
For additional cleaning information, see “Dryer Care.”
2. Load the dryer
Open the door by pulling on the handle. Place laundry in the dryer.
Add a dryer sheet to wet load if desired. Close the door.
IMPORTANT: Do not tightly...


