Whirlpool Adg 6556 Wh Manual
Here you can view all the pages of manual Whirlpool Adg 6556 Wh Manual. The Whirlpool manuals for Dishwasher are available online for free. You can easily download all the documents as PDF.
Page 1
10
GBCONTENTS
BEFORE USING THE DISHWASHERPAGE11
PROTECTING THE ENVIRONMENTPAGE11
PRECAUTIONS AND GENERAL RECOMMENDATIONSPAGE11
CONNECTIONSPAGE12
ELECTRICAL CONNECTIONPAGE13
HOW TO FILL THE SALT CONTAINERPAGE14
HOW TO FILL THE RINSE AID DISPENSERPAGE15
HOW TO FILL THE DETERGENT DISPENSERPAGE16
CARE AND MAINTENANCEPAGE17
To make the most of your new dishwasher, please read these user
instructions and the quick reference guide carefully.
Page 2
11 1.   Removing the packaging and check
After unpacking, make sure that the
dishwasher is undamaged and that the door
closes correctly. If in doubt, contact a qualified
technician or your local retailer.
•      Keep the packaging materials (plastic bags,
polystyrene parts, etc.) out of reach of
children, as they are potentially dangerous.2. Water and electrical connections
All water and electrical connections must be
carried out by a qualified technician in
compliance with the manufacturers...
Page 3
12Do not use the dishwasher if it has been
damaged in transit. Consult your local
retailer or our After-Sales Service.
(Refer to the separate installation instructions
booklet)
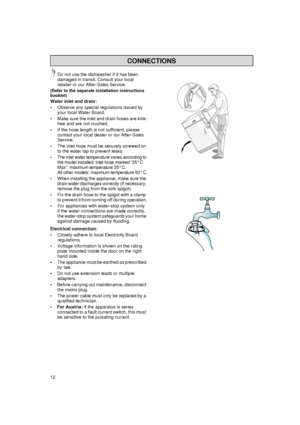
Water inlet and drain:

Observe any special regulations issued by
your local Water Board.

Make sure the inlet and drain hoses are kink-
free and are not crushed.

If the hose length is not sufficient, please
contact your local dealer or our After-Sales
Service.

The inlet hose must be securely screwed on
to the water...
Page 4
13 For Great Britain Only
Warning - this appliance must be
earthed
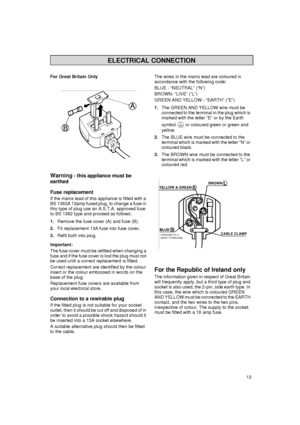
Fuse replacement
If the mains lead of this appliance is fitted with a
BS 1363A 13amp fused plug, to change a fuse in
this type of plug use an A.S.T.A. approved fuse
to BS 1362 type and proceed as follows:
1.Remove the fuse cover (A) and fuse (B).
2.Fit replacement 13A fuse into fuse cover.
3.Refit both into plug.
Important:
The fuse cover must be refitted when changing a
fuse and if the fuse cover is lost the plug must not
be used...
Page 5
14 From a water hardness category of 1-2
(average), before using the dishwasher, fill the
salt container with regeneration salt (to find out
the hardness level of water in your area, contact
your local Water Board or check the last bill you
received).
If the water hardness level does not correspond
to position 3 on the selector (setting on delivery)
or if the water hardness level changes:
Turn the selector to the correct position.
Set the water hardness by turning the selector (if
fitted) inside...
Page 6
15 The rinse aid facilitates drying and prevents the
formation of unsightly spots and streaks on
crockery. Before using the dishwasher for the
first time, fill the rinse aid dispenser.
How to fill the rinse aid dispenser:
Only use rinse aids recommended for use in
domestic dishwashers.
1.   Press button A
 to open the cover
(see drawing).
2. Fill the dispenser with rinse aid up to the
dashed line “max” (about 100 ml.).
Immediately wipe away any rinse aid spilt
accidentally.
This prevents the...
Page 7
16A small compartment   and a large
compartment  are provided for the
detergent.
The use of detergent in excess of the
recommended dosage may cause pollution. The
recommended dosage varies for different
brands.
If you use detergents in pellet form, follow the
manufacturer’s directions for use.
“New generation” detergents contain enzymes
that give better washing results when Bio
programmes are used. However, these
programmes are also suitable for all other
dishwasher detergents.
How to fill the...
Page 8
17
Before cleaning or carrying out
maintenance, switch off the appliance and
turn off the water tap.
Cleaning the outside of the appliance:
To clean the outside of the appliance, use a
neutral detergent and a damp cloth.
Do not use abrasive detergents.
Cleaning the inside of the dishwasher:
Regularly wipe the door seal and inside of
the door with a damp cloth to remove any
food residues.
Upper spray arm:
1.  Slacken the fixing nut (A) (by turning it
counter-clockwise) and detach the spray
arm (B)...


