Sony DPP FP97 User Manual
Here you can view all the pages of manual Sony DPP FP97 User Manual. The Sony manuals for Printer are available online for free. You can easily download all the documents as PDF.
Page 1
4-129-103-11 (4)
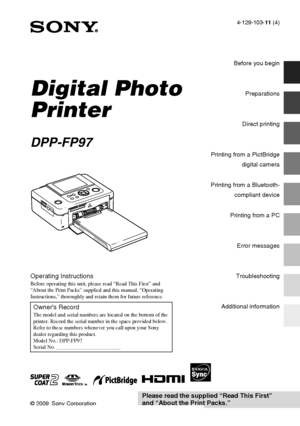
Digital Photo
Printer
DPP-FP97
© 2009 Sony Corporation
Before you begin
Preparations
Direct printing
 Printing from a PictBridge
digital camera
Printing from a Bluetooth-
compliant device
Printing from a PC
Error messages
Troubleshooting
Additional information
D:\Printer\DPP-FP97 series 2008\IM\4129103112DPPFP97IM_GB\4129103114\4129103114DPPFP97IM_GB\010COV.fm Master: Right
DPP-FP97 4-129-103- 11 (4)
Operating InstructionsBefore operating this unit, please read “Read This First” and...
Page 2
2 GB
WARNING
To reduce fire or shock hazard, do not
expose the unit to rain or moisture.
For the customers purchasing
the DPP-FP97 in the U.S.A.
CAUTION
You are cautioned that any changes or modifications
not expressly approved in this manual could void
your authority to operate this equipment.
If you have any questions about this product, you may
call:
Sony Customer Information Services Center
1-800-222-SONY (7669)
The number below is for the FCC related matters
only.
Regulatory Information
Note:...
Page 3
3 GB
Disposal of Old Electrical &
Electronic Equipment (Applicable in
the European Union and other
European countries with separate
collection systems)
This symbol on the
product or on its
packaging indicates that
this product shall not be
treated as household
waste. Instead it shall be
handed over to the
applicable collection
point for the recycling of
electrical and electronic
equipment. By ensuring
this product is disposed
of correctly, you will
help prevent potential
negative...
Page 4
4 GB
On trademarks and copyrights
“BRAVIA” Sync, , Cyber-
shot, , “Memory Stick,”  ,
“Memory Stick Duo,”  ,
“MagicGate Memory Stick,” “Memory Stick PRO,”
, “Memory Stick PRO
Duo,” , “Memory Stick
PRO-HG Duo,”  ,
“Memory Stick Micro,”   ,
, “Memory Stick-ROM,”  ,
“MagicGate,” and   are
trademarks of Sony Corporation.
 HDMI,  , and High-Definition
Multimedia Interface are trademarks or registered
trademarks of HDMI Licensing LLC.
 Microsoft, Windows, Windows Vista and DirectX
are either...
Page 5
5 GB
Table of Contents
Notice for users  ..............................4
Before you begin
Identifying the parts ........................ 7
Preparations
Checking the contents of the
package .......................................... 9
Setting the ink ribbon  .....................9
Inserting the print paper  ............... 10
Connecting to the AC power
source .......................................... 12
Operations in the initial state  .......... 13
Direct printing
LCD screen display...
Page 6
6 GB
Connecting to a High Definition
television and Printing  .................. 45
Connecting to a television  ............. 45
Printing procedures  ....................... 46
Using the printer buttons for
printing .......................................... 46
Using the television remote control
unit for printing  .............................. 46
Printing from an external device  ... 48
Printing from a PictBridge
digital camera
Printing from a PictBridge digital
camera...
Page 7
7 GB
Before you begin
Before you begin
Identifying the parts
For details, see the pages indicated in the
parentheses.
Printer front panel
A1 (on/standby) button/standby
indicator)
BMENU button
C (Index View)  (zoom out)/
 (zoom in) buttons (.page 16)
DLCD screen
EENTER button
FDirection (g/G/f/F) buttons
GAUTO TOUCH-UP button
(.page 20)
HPRINT button/indicator
ICANCEL button
J“Memory Stick PRO” media
(Standard/Duo) slot (.pages 16,
79)
KSD memory Card/xD-Picture Card
dual-format slot (.pages 16,...
Page 8
8 GB
Printer rear panel
AHandleAs illustrated below, raise the handle when
you carry the printer.
When you use the printer, close the handle to
its original position.
Notes
 When you carry the printer, make sure to
remove memory cards, external devices,
the paper tray, AC adaptor, and other
cables. Otherwise malfunctions may occur.
 Set the LCD panel to its original position.
BVentilation holes
CPaper outlet
DDC IN 24 V jack (.page 12)
Plug the supplied AC adaptor into this
connector. Then connect...
Page 9
9 GB
Preparations
Preparations
Checking the contents
of the package
Make sure that the following accessories are
supplied with your printer.
 Paper tray (1)
 AC adaptor (1)
 AC power cord
*1 (1)
 USB cable (1)
 Cleaning cartridge (1)/Cleaning sheet (1)
 CD-ROM (Windows Printer Driver Software
Ver.1.0 and PMB (Picture Motion Browser)
Ver.4.2) (1)
 Operating Instructions (this booklet) (1)
 Read This First (1)
 About the Print Packs (1)
 Warranty (In some regions, the warranty is
not supplied.) (1)...
Page 10
10 GB
Notes
 Do not touch the ink ribbon or store the ink ribbon
in a dusty location. Fingerprints or dust on the ink
ribbon may result in imperfect printing.
 Do not rewind the ink ribbon and use the rewound
ink ribbon for printing. Otherwise, proper printing
results will not be obtained, or a malfunction may
occur. If the ink ribbon does not click into place,
remove it and then re-insert it. Only when the ink
ribbon is too slack to be loaded, keep pressing the
core of the ribbon and wind the...


