Sony DPP FP90 User Manual
Here you can view all the pages of manual Sony DPP FP90 User Manual. The Sony manuals for Printer are available online for free. You can easily download all the documents as PDF.
Page 1
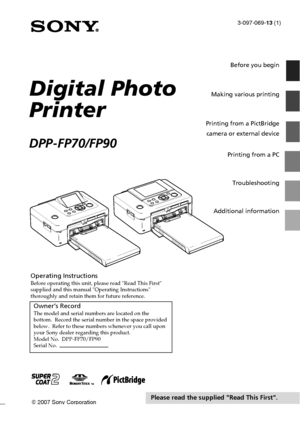
3-097-069-13 (1) 2007 Sony Corporation Operating InstructionsBefore operating this unit, please read Read This First supplied and this manual Operating Instructions thoroughly and retain them for future reference. Owner’s RecordThe model and serial numbers are located on the bottom. Record the serial number in the space provided below. Refer to these numbers whenever you call upon your Sony dealer regarding this product. Model No. DPP-FP70/FP90 Serial No. Digital Photo Printer DPP-FP70/FP90 Before...
Page 2
2 GB
WARNING
To reduce fire or shock hazard, do not
expose the unit to rain or moisture.
For the customers in the U.S.A.
CAUTION
You are cautioned that any changes or
modifications not expressly approved in this
manual could void your authority to operate this
equipment.
If you have any questions about this product, you
may call:
Sony Customer Information Services Center
1-800-222-SONY (7669)
The number below is for the FCC related
matters only.
Regulatory Information
  Declaration of Conformity
Trade...
Page 3
3 GB
environment and human health, which could
otherwise be caused by inappropriate waste handling
of this product. The recycling of  materials will help to
conserve natural resources. For more detailed
information about recycling of this product, please
contact your local Civic Office, your household waste
disposal service or the shop where you purchased the
product.
NOTICE FOR CUSTOMERS IN THE
UNITED KINGDOM
A moulded plug complying with BS 1363 is fitted to this
equipment for your safety and...
Page 4
4 GB
Notice for users
Program © 2007 Sony Corporation
Documentation ©2007 Sony Corporation
A
ll rights reserved. This manual or the software
described herein, in whole or in part, may not be
reproduced, translated or reduced to any machine
readable form without prior written approval from
Sony Corporation.
IN NO EVENT SHALL SONY CORPORATION BE
LIABLE FOR ANY INCIDENTAL,
CONSEQUENTIAL OR SPECIAL DAMAGES,
WHETHER BASED ON TORT, CONTACT, OR
OTHERWISE, ARISING OUT OF OR IN
CONNECTION WITH THIS MANUAL, THE...
Page 5
5 GB
Table of contents
Before you begin
Identifying the parts ............................... 6
LCD screen display .................................. 8
An image preview ..................................... 8
Image list .................................................. 9
Making various printing
Correcting a failed photo automatically
(AUTO TOUCH-UP) ......................... 10
Printing with the AUTO TOUCH-UP
adjustments ............................................ 10
Making easy printing...
Page 6
6 GB
Identifying the parts
For details, see the pages indicated in the
parentheses.
Illustrations are of DPP-FP70. The button
locations and names of the DPP-FP90 are
identical, although the LCD screen type is
different.
Printer front panel
11 (on/standby) switch/indicator
(.Read This First)
2MENU button
3
 (zoom out)/ (zoom in) buttons
(page 9)
4LCD screen
2.5 type DPP-FP70 / 3.6 type DPP-FP90
5ENTER button
6Direction (f/F/g/G) buttons
7AUTO TOUCH-UP button (page 10)
8PRINT button/indicator
9CANCEL...
Page 7
7 GB
Before you begin
Printer rear panel
1Handle
As illustrated below, raise the handle
when you bring the printer.
When you use the printer, close it to its
original position.
Notes
•When you bring the printer, make sure
to remove memory cards, external
device, and paper tray. Otherwise
malfunctions may occur.
•When using the DPP-FP90, set the LCD
panel to its original position.
2Ventilation holes
3DC IN 24V jack (.Read This First)
Connect the supplied AC power adaptor
into this connector.
Printer left...
Page 8
8 GB
LCD screen display
An image preview
Each time you press ENTER, an image
display mode changes. To display a
different image, press g/G.
1Input/setting indications
Input indications and settings
information for an image are displayed.
Icons Meaning
“Memory Stick” or
“Memory Stick Duo” input
SD/miniSD Card input
CompactFlash input
External Device input
Protect indication
DPOF preset indication
Associated file indication
(Displayed when there is
an associated file such as a
motion file or a miniature...
Page 9
9 GB
Before you begin
Image list
DPP-FP70
DPP-FP90
1Cursor (orange frame)
You can move the cursor by pressing f/
F/g/G.
2Operation tips
3Scroll bar
Indicates the position of the image
among the total number of images.
Switching the screen
display between an image
preview and image list
You can switch an image preview
and the image list as follows:
•To display the image list
In an image preview, press
(zoom out).
When an image is enlarged, press
 repeatedly. An image is reduced
up to the original scale...
Page 10
10 GB
Making various printing
Correcting a failed
photo automatically
(AUTO TOUCH-UP)
What is “AUTO TOUCH-UP” feature?
The “AUTO TOUCH-UP” feature allows you to
adjust an image automatically as follows in
addition to the Auto Fine Print4 automatic
adjustment:
•Brightness adjustment using the face
recognition
Detects the face automatically and adjusts the
brightness so that the face becomes of its
optimum brightness.
•Out-of-focus reduction
Detects the out-of-focus level automatically
and corrects the...


