Singer 274 Manual
Here you can view all the pages of manual Singer 274 Manual. The Singer manuals for Sewing Machine are available online for free. You can easily download all the documents as PDF.
Page 1
27 & 28
INSTRUCTIONS
FOR USING
SINGER*
SEWING MACHINE NO. 27 & 28
VIBRATING SHUTTLE, FOR FAMIL YUSE
THE SINGER MANUFACTURING CO.
When requiring
Needle, Oil,
Parts or Repairs,
for your Machine Look for the
Red S
There are Singer
Shops in every City
Page 2
27 & 28
W arning
T o all whom it may concern
Singer Service
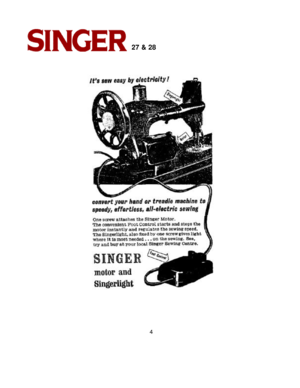
It’s sew easy by electricity The Hand Attachment
Stop Motion
T o Operate the Hand Machine
T o Ensure Perfect Action of the Machine
T o Set the Needle
To Thread the Needle
T o Wind the Bobbin
T o Remove the Shuttle
To Thread the Shuttle
To Replace the Shuttle
T o Prepare for Sewing
To Commence Sewing
T o Remove the Work
T o Regulate the  Tension
To Alter the Length of Stitch
T o Change the Pressure on Material
To Turn a Corner
T o Sew Flannel...
Page 3
3
27 & 28
W ARNING
It is essential that your machine should be kept well oiled, in accordance with the
instructions given on pages 13 and 14 of this
book.
SINGER Oil , which is specially prepared for
sewing machines, is supplied in tins which have the well-known SINGER Red S printed
thereon.
SINGER Needles are stamped with the  Trade
Mark SIMANCO* and are sold in green pack -
ets which also bear the SINGER  Red Letter
 S .
Needles in Containers marked
 For Singer Machines
are not SINGER made...
Page 5
5
27 & 28
The Hand Attachment
When the cover is removed from the machine, the hand attachment will be \
found to be out of working position, as shown in Fig. 1.
T o operate the machine, pull the small spring stud (2, Fig. 1) and turn\
 the handle back until
the lever (1, Fig. 1) enters the socket (3, Fig. 1); also see that t\
he hinged finger (4, Fig. 2) is turned back between the spokes of the wheel. The machine will then be re\
ady for working, as
shown in Fig. 2.
Before replacing the cover, the...
Page 6
627 & 28
Stop Motion
This device a allows the hand wheel to run free, so that bobbins may be wound without
operating the mechanism.  To loosen the
wheel hold it with the left hand and with the
right hand turn the stop motion screw over
towards you, as shown in Fig. 3.
To Operate the Hand Machine
T ighten the hand wheel (see Fig. 3) and
place a piece of material under the presser foot (7, Fig. 5). Then lower the latter by
means of the lifter (3, Fig. 5). Now turn the handle over from you to work the...
Page 7
727 & 28
T o Ensure Perfect Action of the Machine
The hand wheel must always turn over
towards you.
Do not work the machine with the presserfoot lowered or with the shuttle and the nee -
dle threaded, except when sewing
Both slides over the shuttle must be kept
closed.
To Set the Needle
(See Fig. 4)
Raise the needle bar to its highest point and loosen the thumb screw .
( A ). Hold the needle with the left hand and,
with its flat side to the right, insert it into the needle clamp ( B) as far as it will...
Page 8
8
27 & 28
T o Thread the Needle
(See Fig. 5)
T urn the hand wheel heel until the lever (2) is
at its highest. Place a reel of thread on the spool pin and pass the thread through the
notch (13) down, and from right to left under and between the tension discs (12), and up
through the eyelet in the take-up spring (4).
Then pass the thread from the front through
the hole in the lever (2), down through the
guard (5), into the guide (6), and  from left to
right through the eye of the needle. Draw
about three...
Page 9
9
27 & 28
T o Wind the Bobbin
(See Fig. 6)
Loosen the hand wheel (see Fig. 3) and push
the top of the winder from you until its rubber ring (5) just touches the ledge of the hand
wheel.  Turn the latter over towards you until
the thread guide (2) moves to the extreme
right. Place a reel of thread on the spool pin;
and pass the end of thread through the notch
at top of the face plate (13, Fig. 5); then
thread the winder by passing the thread upward through the eyelet (1) and into the
notch (2). Draw the...
Page 10
10
27 & 28
T o Remove the Shuttle
Open the front slide of the machine and turn the hand wheel towards you \
until the shuttle comes full under the opening. Press down the point of the shuttle with t\
he thumb and lift out.
T urn the open end of the shuttle downward and the bobbin will drop out.
NOTE:  The shuttle should not be lifted out by the spring.
T o Thread the Shuttle
Hold the shuttle, as in Fig. 7, and insert the bobbin so that the end of\
 the thread draws from the left towards the right, as...


