Home
>
Panasonic
>
System
>
Digital Imaging Systems For Setting Up The Printer Driver And The Panasonic Document Management System Dp 8020 Operating Instructions
Digital Imaging Systems For Setting Up The Printer Driver And The Panasonic Document Management System Dp 8020 Operating Instructions
Here you can view all the pages of manual Digital Imaging Systems For Setting Up The Printer Driver And The Panasonic Document Management System Dp 8020 Operating Instructions . The Panasonic manuals for System are available online for free. You can easily download all the documents as PDF.
Page 1
Before operating this machine, please carefully read this manual, and ke\
ep this
documentation in a safe place for future reference.
(Illustration shows optional accessories that may not be installed on y\
our machine.)
English
Operating Instructions
(For Setting up the Printer Driver and the
Panasonic Document Management System)
Digital Imaging Systems
Model No.   DP-8020P / 8020E / 8016P
Installation
■ Installing the Printer Driver, and Application
Software
● System Requirements...
Page 2
2
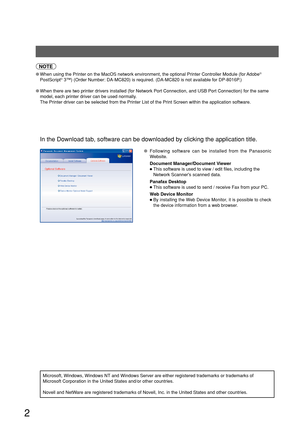
●When using the Printer on the MacOS network environment, the optional Pr\
inter Controller Module (for Adobe®
PostScript® 3™) (Order Number: DA-MC820) is required. (DA-MC820 is not avail\
able for DP-8016P.)
●
When there are two printer drivers installed (for Network Port Connecti\
on, and USB Port Connection) for the same
model, each printer driver can be used normally.
The Printer driver can be selected from the Printer List of the Print Sc\
reen within the application software.
Microsoft, Windows,...
Page 3
3
Installation
Installation
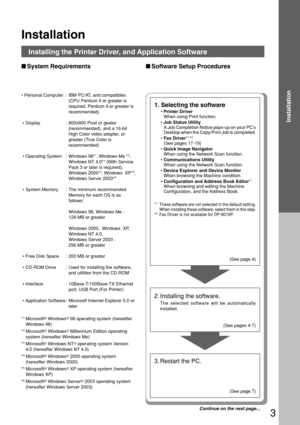
■System Requirements
Installing the Printer Driver, and Application Software
■Software Setup Procedures
1. Selecting the software
•Printer Driver
When using Print function.
• Job Status Utility
A Job Completion Notice pops-up on your PCs
Desktop when the Copy/Print Job is completed.
• Fax Driver *
1 *2
(See pages 17-19)
• Quick Image Navigator
When using the Network Scan function.
• Communications Utility
When using the Network Scan function.
• Device Explorer and Device...
Page 4
Installation
4
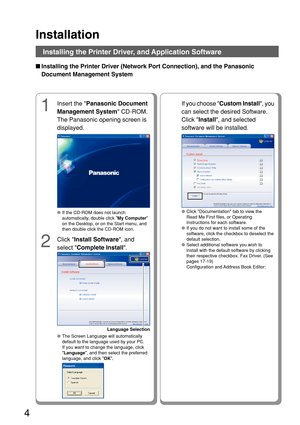
■Installing the Printer Driver (Network Port Connection), and the Panas\
onic
Document Management System
If you choose Custom Install , you
can select the desired Software.
Click  Install , and selected
software will be installed.
1
Insert the  Panasonic Document
Management System  CD-ROM.
The Panasonic opening screen is
displayed.
2
Click  Install Software , and
select  Complete Install .
Installing the Printer Driver, and Application Software
●If the CD-ROM does not launch
automatically,...
Page 5
5
Installation
3
The InstallShield Wizard screen is
displayed.
4
Check I accept the terms of the
license agreement , and then click
 Next .
Continue on the next page...
5
Click  Next.
●Above Screen will not be shown when the
other models  Panasonic Document
Management System  has been installed.
6
Click Next.
●The above Screen will not be shown if there
is another models  Panasonic Document
Management System  installed.
●
Make sure that your machine is connected
to the network properly, and/or the Power...
Page 6
Installation
6
7
The Wizard automatically searches
for machines connected to your
network, and displays the found units
in the Network Printer  window.
●Only the machines connected to the same
subnet can to be used as a network printer.
●
If your machine has not been connected to
the network yet, enter its allocated IP
Address, and then click  Next to proceed
with the installation.
■ Installing the Printer Driver (Network Port Connection), and the Panas\
onic
Document Management System
Installing the...
Page 7
7
Installation
11
Click Install .
12
Click Finish .
10
Select  Enable Communications
(Recommended) , and then click
 Next .
●Above screen will be displayed when you have
installed the Windows XP Service Pack 2.
●If you cannot shut down the computer
immediately, choose  No. I will restart my
computer later. . However, the new setting
is only applied after rebooting your
computer.
Page 8
Installation
8
■Installing the Printer Driver for USB Port Connection
1
Insert the  Panasonic Document
Management System  CD-ROM.
The Panasonic opening screen is
displayed.
2
Select  Printer Driver Install .
USB Port Printer Connection
●If the CD-ROM does not launch
automatically, double-click  My Computer
on the Desktop, or on the Start menu, and
then double-click the CD-ROM icon.
1. Select the Printer Driver Install.
2. Install the Printer Driver for USB
Connection.
3. Restart the PC.
(See pages 8-14)...
Page 9
9
Installation
5
Click Next.
●The above Screen will not be shown if
there is other models  Panasonic
Document Management System  installed.
●
If you wish to change the folder, click
Browse , and then the desired folder to
install.
3
The InstallShield Wizard screen is
displayed.
4
Check  I accept the terms of the
license agreement , and then click
 Next .
6
Select the Printer Driver that you
want to install, and then click  Next.
Continue on the next page...
2
●Make sure that your machine is connected
to...
Page 10
Installation
10
8A

Connect the USB cable to your
machine, and then turn the Power
Switch ON, and click Next.
7
Click  Install .
USB Port Printer Connection
■Installing the Printer Driver for USB Port Connection
Windows 98 / Windows Me
    go to steps 8A and 9
W indows 2000
   go to steps 8B and 9
W indows XP / Windows Server 2003
   go to steps 8C and 9


