BenQ Cp270 Dlp Users Manual
Here you can view all the pages of manual BenQ Cp270 Dlp Users Manual. The BenQ manuals for Projector are available online for free. You can easily download all the documents as PDF.
Page 41
Operation 41
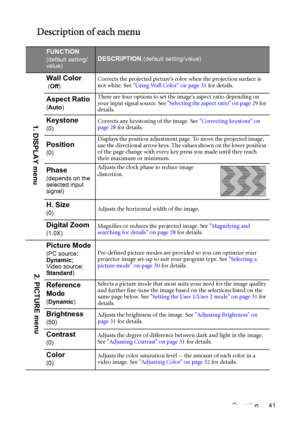
Description of each menu
FUNCTION
(default setting/
value)DESCRIPTION (default setting/value)
Wall Color
 (Off)Corrects the projected picture’s color when the projection surface is
not white. See Using Wall Color on page 31 for details.
Aspect Ratio
(Auto)There are four options to set the images aspect ratio depending on
your input signal source. See Selecting the aspect ratio on page 29 for
details.
Keystone
(0)Corrects any keystoning of the image. See Correcting keystone on
page 28 for...
Page 42
Operation 42
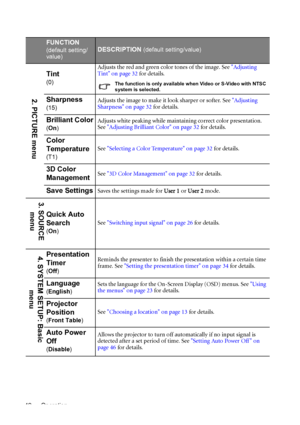
FUNCTION
(default setting/
value)DESCRIPTION (default setting/value)
Tint
(0)Adjusts the red and green color tones of the image. See Adjusting
Tint on page 32 for details.The function is only available when Video or S-Video with NTSC
system is selected.
Sharpness
(15)Adjusts the image to make it look sharper or softer. See Adjusting
Sharpness on page 32 for details.
Brilliant Color
(On)Adjusts white peaking while maintaining correct color presentation.
See Adjusting Brilliant Color on...
Page 43
Operation 43
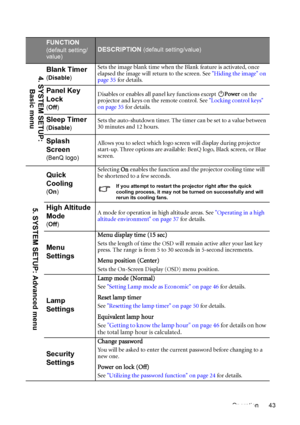
FUNCTION
(default setting/
value)DESCRIPTION (default setting/value)
Blank Timer
(Disable)Sets the image blank time when the Blank feature is activated, once
elapsed the image will return to the screen. See Hiding the image on
page 35 for details.
Panel Key
Lock
(Off)Disables or enables all panel key functions except Power on the
projector and keys on the remote control. See Locking control keys
on page 35 for details.
Sleep Timer
(Disable)Sets the auto-shutdown timer. The timer can be...
Page 44
Operation 44
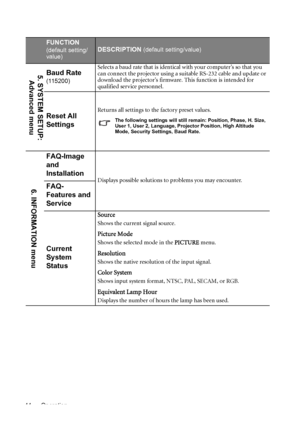
FUNCTION
(default setting/
value)DESCRIPTION (default setting/value)
Baud Rate
(115200)Selects a baud rate that is identical with your computer’s so that you
can connect the projector using a suitable RS-232 cable and update or
download the projector’s firmware. This function is intended for
qualified service personnel.
Reset All
SettingsReturns all settings to the factory preset values.
The following settings will still remain: Position, Phase, H. Size,
User 1, User 2, Language,...
Page 45
Maintenance 45
Maintenance
Care of the projector
Your projector needs little maintenance. The only thing you need to do on a regular basis is
to keep the lens clean.
Never remove any parts of the projector except the lamp. Contact your dealer if other parts
need replacing.
Cleaning the lens
Clean the lens whenever you notice dirt or dust on the surface.
• Use a canister of compressed air to remove dust.
• If there is dirt or smears, use lens-cleaning paper or moisten a soft cloth with lens cleaner...
Page 46
Maintenance 46
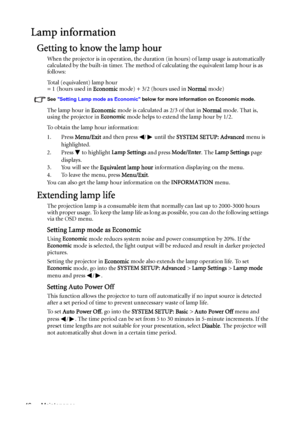
Lamp information
Getting to know the lamp hour
When the projector is in operation, the duration (in hours) of lamp usage is automatically
calculated by the built-in timer. The method of calculating the equivalent lamp hour is as
follows:
Total (equivalent) lamp hour
= 1 (hours used in Economic mode) + 3/2 (hours used in Normal mode)
See Setting Lamp mode as Economic below for more information on Economic mode.
The lamp hour in Economic mode is calculated as 2/3 of that in Normal mode....
Page 47
Maintenance 47
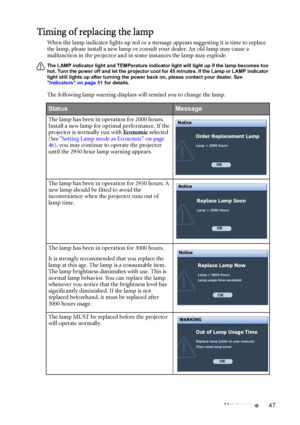
Timing of replacing the lamp
When the lamp indicator lights up red or a message appears suggesting it is time to replace
the lamp, please install a new lamp or consult your dealer. An old lamp may cause a
malfunction in the projector and in some instances the lamp may explode.
The LAMP indicator light and TEMPerature indicator light will light up if the lamp becomes too
hot. Turn the power off and let the projector cool for 45 minutes. If the Lamp or LAMP indicator
light still lights...
Page 48
Maintenance 48
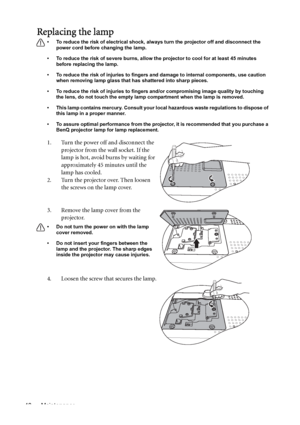
Replacing the lamp
• To reduce the risk of electrical shock, always turn the projector off and disconnect the
power cord before changing the lamp.
• To reduce the risk of severe burns, allow the projector to cool for at least 45 minutes
before replacing the lamp.
• To reduce the risk of injuries to fingers and damage to internal components, use caution
when removing lamp glass that has shattered into sharp pieces.
• To reduce the risk of injuries to fingers and/or compromising image...
Page 49
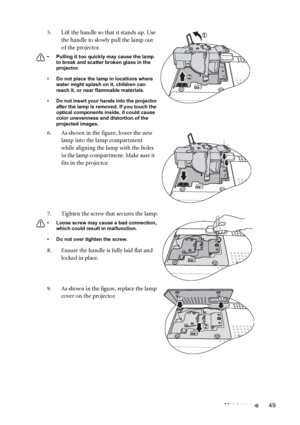
Maintenance 49 5. Lift the handle so that it stands up. Use
the handle to slowly pull the lamp out
of the projector.
• Pulling it too quickly may cause the lamp
to break and scatter broken glass in the
projector.
• Do not place the lamp in locations where
water might splash on it, children can
reach it, or near flammable materials.
• Do not insert your hands into the projector
after the lamp is removed. If you touch the
optical components inside, it could cause
color unevenness and distortion of...
Page 50
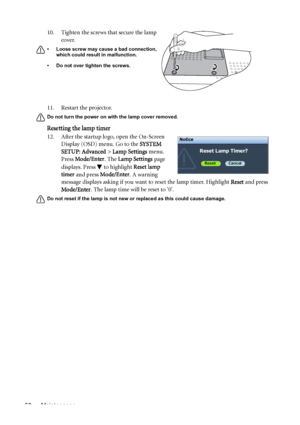
Maintenance 5011. Restart the projector.
Do not turn the power on with the lamp cover removed.
Resetting the lamp timer
12. After the startup logo, open the On-Screen
Display (OSD) menu. Go to the SYSTEM
SETUP: Advanced > Lamp Settings menu.
Press Mode/Enter. The Lamp Settings page
displays. Press   to highlight Reset lamp
timer and press Mode/Enter. A warning
message displays asking if you want to reset the lamp timer. Highlight Reset and press
Mode/Enter. The lamp time will be reset to 0.
Do not...
