AEG B3101-5-m Manual
Here you can view all the pages of manual AEG B3101-5-m Manual. The AEG manuals for Oven are available online for free. You can easily download all the documents as PDF.
Page 2
Contents2
Contents
Operating Instructions 3
Safety instructions  3
Description of the Appliance  4
General Overview  4
Control Panel  5
Oven Features  5
Oven Accessories  6
Grill set  6
Before using for the first time  7
Setting and changing the current time  7
Initial Cleaning  7
Operating the Oven  8
Switching the Oven On and Off  8
Oven Functions  9
Inserting the Oven Shelf and the Roasting Pan
9
Grill set  11
Non-stick accessories  11
Clock Functions  12
Usage, Tables and Tips  17
Baking...
Page 3
3 Operating Instructions
Operating Instructions
1Safety instructions
Electrical safety
•This appliance must be connected by a qualified electrician only.
In the event of a fault or damage to the appliance: take the fuses out or switch off.
Repairs to the appliance must only be carried out by qualified service engineers.
Considerable danger may result from improper repairs. If repairs become necessary,
please contact your local Service Force Centre.
Child Safety
Never leave children unsupervised when...
Page 4
Description of the Appliance4
3Note on enamel coating
Changes in the colour of the oven’s enamel coating as a result of use do not affect the
appliance’s suitability for normal and correct use. They therefore do not constitute a de-
fect in the sense of the warranty law.
Description of the Appliance
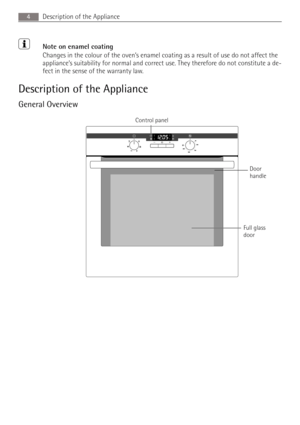
General Overview

Full glass
door Control panel
Door
handle
Page 5
5 Description of the Appliance
Control Panel

Oven Features
All of the interior walls of the oven are coated in a special enamel (catalytic coating).
Oven Power Indicator Temperature Pilot Light
Time display
Clock function buttons
Temperature selector
Oven Functions
Top heat and heating elements
Oven lighting
Fan heating element
Fan Shelf positions
Oven shelf runners, removable
Page 6
Description of the Appliance6
Inside of door
On the inside of the oven door you will find the
numbers of the different oven shelves.
You will also find some brief information about
the ovens functions, recommended shelves and
temperatures for cooking the most popular
dishes.
Oven Accessories
Oven shelf for non-stick
For cookware, cake tins, roasts and grilled
foods.
Grill set
Grill
Insert for the roasting pan for roasting and
grilling.
Roasting Pan
For baking and roasting or as a pan for...
Page 7
7 Before using for the first time
Before using for the first time
Setting and changing the current time
3The oven only operates when the time has been set.
When the appliance has been connected to the
electrical supply or when there has been a pow-
er cut, the function indicator Time  flashes
automatically.
1.To change the time that has already been set,
press the Selection  button repeatedly, until
the function indicator Time  flashes.
2.Set the current time using the   or  button.
After approx. 5...
Page 8
Operating the Oven8
To prevent damaging the door or door glass, avoid the use of the following:
Household detergent and bleaches
Impregnated pads unsuitable for non-stick saucepans
Brillo/Ajax pads or steel wool pads
Chemical oven pads or aerosols
Rust removers
Bath/Sink stain removers
1.Turn the oven function switch to oven lighting  .
2.Remove all accessories and the shelf support rails and wash them with warm water and
washing up liquid.
3.Wash the floor of the oven in the same way using warm soapy...
Page 9
9 Operating the Oven
2.Turn the temperature control knob to the desired temperature.
The power indicator is lit while the oven is on.
The temperature power indicator is lit while the oven is heating up.
3.To turn the oven off, turn the oven functions and temperature control knob back to the
Off position.
3Cooling fan
The fan switches on automatically in order to keep the appliance’s surfaces cool. When
the oven is switched off, the fan continues to run to cool the appliance down, then
switches itself...
Page 10
Operating the Oven10
Inserting the roasting pan:
Push the roasting pan between the guide bars
of the selected oven level.
Inserting the oven shelf:
Insert the oven shelf so that the feet point
downwards.
Push the oven shelf between the guide bars of
the selected oven level.
3The high rim around the oven shelf is an addi-
tional device to prevent cookware from slip-
ping.
Inserting the oven shelf and the roasting
pan together:
Lay the oven shelf on the roasting pan.
Push the roasting pan between...


