Yamaha EF1000iS Service Manual
Here you can view all the pages of manual Yamaha EF1000iS Service Manual. The Yamaha manuals for Motorcycle are available online for free. You can easily download all the documents as PDF.
Page 2
FOREWORD
This manual was written by the Yamaha Motor
Company primarily for use by Yamaha dealers
and their qualified mechanics. It is not possible
to put an entire mechanic’s education into one
manual, so it is assumed that persons using
this book to perform maintenance and repairs
on Yamaha generators have a basic under-
standing of the mechanical precepts and pro-
cedures inherent to generator repair
technology. Without such knowledge,
attempted repairs or service to this model may
render it unfit for...
Page 3
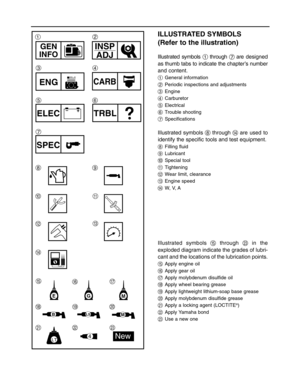
ILLUSTRATED SYMBOLS
(Refer to the illustration)
Illustrated symbols 1through 7are designed
as thumb tabs to indicate the chapter’s number
and content.
1General information
2Periodic inspections and adjustments
3Engine
4Carburetor
5Electrical
6Trouble shooting
7Specifications
Illustrated symbols 8through rare used to
identify the specific tools and test equipment.
8Filling fluid
9Lubricant
0Special tool
qTightening
wWear limit, clearance
eEngine speed
rW,  V,  A
Illustrated symbols tthrough din the...
Page 4
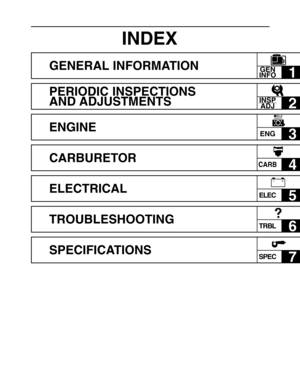
INDEX
GENERAL INFORMATIONGEN
INFO
PERIODIC INSPECTIONS
AND ADJUSTMENTS
INSP
ADJ
ENGINEENG
CARBURETORCARB
ELECTRICALELEC
TROUBLESHOOTINGTRBL
SPECIFICATIONSSPEC
1
2
3
4
5
6
7
7VV10-00  02.10.4 10:35 AM  Page 3
Page 5
CHAPTER 1.
GENERAL INFORMATION
MACHINE IDENTIFICATION....................1-1
SERIAL NUMBER................................1-1
STARTING SERIAL NUMBER.............1-1
IMPORTANT INFORMATION...................1-2
PREPARATION FOR REMOVAL AND
DISASSEMBLY
CAUTION ON SERVICE .....................1-2
NOTES ON SERVICE .........................1-2
ALL REPLACEMENT PARTS ..............1-3
GASKETS, OIL SEALS,
AND O-RINGS .....................................1-3
BEARINGS AND  OIL SEALS ..............1-3
SPECIAL TOOLS...
Page 6
CRANKSHAFT INSTALLATION ...... 3-27
CYLINDER (CRANKCASE 1) AND
VALVE ................................................... 3-29
VALVE AND  VALVE  SPRING
REMOVAL ....................................... 3-31
VALVE AND  VALVE  SPRING
INSPECTION ................................... 3-31
VALVE SEAT INSPECTION  ............ 3-33
CYLINDER (CRANKCASE 1)
INSPECTION ................................... 3-35
VALVE AND  VALVE  SPRING
ASSEMBLY ...................................... 3-35
CHAPTER 4.
CARBURETOR
CARBURETOR...
Page 7
GEN
INFO
1-1
MACHINE IDENTIFICATION
1
7VV–
7VV-24163-00
GENERAL INFORMATION
MACHINE IDENTIFICATION
SERIAL NUMBER
The serial number is printed on a label 1
which is affixed to the generator as shown.
NOTE:
The first three characters of this number are
for model identification, the remaining digits
are the unit production number.
STARTING SERIAL NUMBER
7VV-200101~
NOTE:
Designs and specifications are subject to
change without notice.
7VV10-01  02.10.4 10:36 AM  Page 1
Page 8
GEN
INFO
1-2
SVU1030
SVU1040
SVU1050
SVU1060
SVU1070
SVU1080
SVU1090
SVU1100
IMPORTANT INFORMATION
PREPARATION FOR REMOVAL AND DISASSEMBLY
CAUTION ON SERVICE
1. Fire prevention
When servicing the engine, always keep the engine and yourself
away from fire.
NOTES ON SERVICE
1. Correct tools
Be sure to use the correct special tool for the job to guard
against damage.
IMPORTANT INFORMATION
2. Oil, grease and seals
Be sure to use genuine Yamaha oils, grease and sealers, or the
equivalents.
3. Expendable...
Page 9
GEN
INFO
1-3
SVU1110
SVU1120
ALL REPLACEMENT PARTS
We recommend the use of genuine Yamaha parts for all replace-
ments. Use oil and/or grease, recommended by Yamaha, for
assembly and adjustment.
GASKETS, OIL SEALS, AND O-RINGS
1. All gaskets, seals, and O-rings should be replaced when an
engine is overhauled. All gaskets surfaces, oil seal lips, and O-
rings must be cleaned.
2. Properly oil all mating parts and bearings during reassembly.
Apply grease to the oil seal lips.
BEARINGS AND OIL SEALS
Install...
Page 10
GEN
INFO
1-4
SVU1150
SVU1160
SVU1170
SVU1180
SVU1190
SVU1205
SPECIAL TOOLS AND TESTERS
The proper special tools are necessary for complete and accurate
tune-up and assembly. Using the correct special tool will help pre-
vent damage caused by the use of improper tools or improvised
techniques.
1. Thickness gauge
P/N. YU-26900-9, 90890-03079
This gauge is used to adjust valve clearance, piston clearance
and piston ring end gap.
2. Cylinder gauge
Commercially obtainable
This instrument is used for checking...


