Whirlpool Gz25fsrxyy 5 Owners Manual
Here you can view all the pages of manual Whirlpool Gz25fsrxyy 5 Owners Manual. The Whirlpool manuals for Refrigerator are available online for free. You can easily download all the documents as PDF.
Page 1
THANK YOU for purchasing this high-quality product. If you should experience a problem not covered in TROUBLESHOOTING,
please visit our website at www.whirlpool.com for additional information. If you still need assistance, call us at 1-800-253-1301.
In Canada, visit our website at www.whirlpool.ca or call us at 1-800-807-6777.
You will need your model and serial number, located on the inside wall of the refrigerator compartment.

REFRIGERATOR SAFETY
Table of Contents  /  Índice / Table des...
Page 2
2
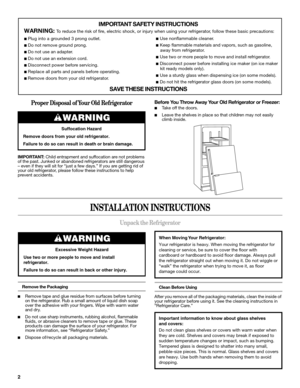
Proper Disposal of Your Old Refrigerator
IMPORTANT: Child entrapment and suffocation are not problems
of the past. Junked or abandoned refrigerators are still dangerous
– even if they will sit for “just a few days.” If you are getting rid of
your old refrigerator, please follow these instructions to help
prevent accidents.
Before You Throw Away Your Old Refrigerator or Freezer:
■Take off the doors.
■Leave the shelves in place so that children may not easily
climb inside.
INSTALLATION INSTRUCTIONS...
Page 3
3
Location Requirements
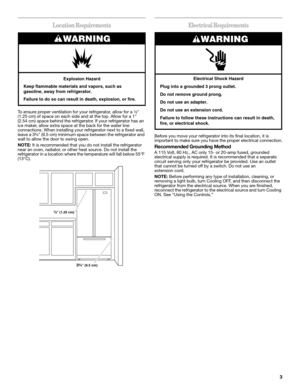
To ensure proper ventilation for your refrigerator, allow for a ¹⁄₂
(1.25 cm) of space on each side and at the top. Allow for a 1
(2.54 cm) space behind the refrigerator. If your refrigerator has an
ice maker, allow extra space at the back for the water line
connections. When installing your refrigerator next to a fixed wall,
leave a 3³⁄₄ (9.5 cm) minimum space between the refrigerator and
wall to allow the door to swing open.
NOTE: It is recommended that you do not install...
Page 4
4
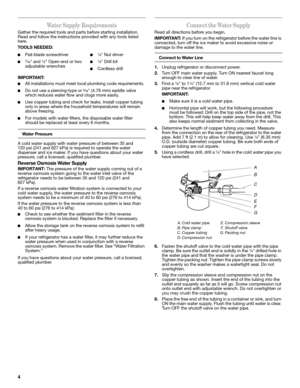
Water Supply Requirements
Gather the required tools and parts before starting installation.
Read and follow the instructions provided with any tools listed
here.
TOOLS NEEDED:
IMPORTANT:
■All installations must meet local plumbing code requirements.
■Do not use a piercing-type or ³⁄₁₆ (4.76 mm) saddle valve
which reduces water flow and clogs more easily.
■Use copper tubing and check for leaks. Install copper tubing
only in areas where the household temperatures will remain
above freezing.
■For...
Page 5
5
Connect to Refrigerator
1.Create a service loop (minimum diameter of 2 ft [61 cm]) with
the copper tubing. Avoid kinks when coiling the copper
tubing.
2.Remove the plastic cap from water valve inlet port. Place a
compression nut and sleeve on the copper tubing.
3.Insert the end of the copper tubing into the water valve inlet
port. Shape tubing slightly so that the tubing feeds straight
into the port to avoid kinks.
4.Slide the compression nut over the sleeve and screw into the
water valve...
Page 6
6
1.Unplug refrigerator or disconnect power.
2.Remove the base grille. Grasp the grille firmly and pull it
toward you.
3.Starting with the right-hand side door, remove the parts for the
top hinge as shown in Top Hinge graphic. Lift the refrigerator
door from the bottom hinge pin.
4.Remove top hinge cover from the left side refrigerator door.
5.Disconnect the wiring plug located on top of the hinge by
wedging a flat-blade screwdriver or your fingernail between
the two sections. See Connections...
Page 7
7
Drawer Front Removal
A. Loosen 4 Door Bracket Screws
A
Drawer Front Replacement
Door Removal & Replacement
Top Hinges
A. Hinge Cover Screw
B. Top Hinge Cover
C.
5/16 Hex-Head Hinge Screws
D. Top Hinge
A. Hinge Pin Cover
C. Hinge Screws B. Bottom Hinge
Bottom Hinges
A
B
C
1
2
B
A
C
D
Connections
A
B
A. Wiring Plug
B. Water Line Connection
Page 8
8
Adjust the Doors
IMPORTANT:
■Your refrigerator has two adjustable, front leveling screws –
one on each side of the refrigerator base. If your refrigerator
seems unsteady or you want the door to close easier, use the
instructions below.
■Before moving the refrigerator, raise the leveling screws so the
front rollers are touching the floor.
1.Remove the base grille. Grasp the grille firmly and pull it
toward you.
2.Raise or lower the cabinet.
Using a ¹⁄₄ hex driver, turn the leveling screw on each...
Page 9
9 Cooling On/Off:
■Cooling On/Off turns off cooling for both compartments. It
does not disconnect power to the refrigerator.
■Press and hold Cooling On/Off for 3 seconds. The LED will
light up to indicate that cooling is Off. Press the button again
to turn on the cooling. The LED will turn off.
Adjusting Controls
The REFRIGERATOR control adjusts the refrigerator compartment
temperature. The FREEZER control adjusts the freezer
compartment temperature.
If you need to adjust the temperature in...
Page 10
10
Crisper Humidity Control
You can control the amount of humidity in the moisture-sealed
crisper. Depending on your model, adjust the control to any
setting between FRUIT and VEGETABLES or LOW and HIGH.
FRUIT/LOW (open) for best storage of fruits and vegetables with
skins.
VEGETABLES/HIGH (closed) for best storage of fresh, leafy
vegetables.
Ice Maker and Ice Storage Bin
IMPORTANT:
■Flush the water system before turning on the ice maker. See
“Water and Ice Dispenser.”
■The ice maker and storage...
All Whirlpool manuals


![Page 5
5
Connect to Refrigerator
1.Create a service loop (minimum diameter of 2 ft [61 cm]) with
the copper tubing. Avoid kinks when coiling the copper
tubing.
2.Remove the plastic cap from water valve inlet port. Place a
compression nut and sleeve on the copper tubing.
3.Insert the end of the copper tubing into the water valve inlet
port. Shape tubing slightly so that the tubing feeds straight
into the port to avoid kinks.
4.Slide the compression nut over the sleeve and screw into the
water valve... Page 5
5
Connect to Refrigerator
1.Create a service loop (minimum diameter of 2 ft [61 cm]) with
the copper tubing. Avoid kinks when coiling the copper
tubing.
2.Remove the plastic cap from water valve inlet port. Place a
compression nut and sleeve on the copper tubing.
3.Insert the end of the copper tubing into the water valve inlet
port. Shape tubing slightly so that the tubing feeds straight
into the port to avoid kinks.
4.Slide the compression nut over the sleeve and screw into the
water valve...](http://img.usermanuals.tech/thumb/81/59981/w300_whirlpool-gz25fsrxyy-5-owners-manual-1488809221_d-4.png)


