Vivitar Vivicam 7020 Users Manual
Here you can view all the pages of manual Vivitar Vivicam 7020 Users Manual. The Vivitar manuals for Digital Camera are available online for free. You can easily download all the documents as PDF.
Page 1
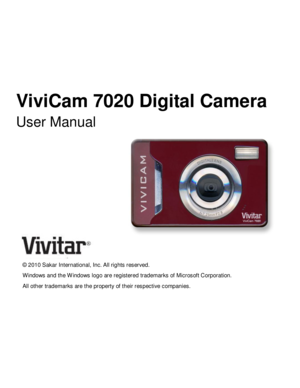
Downloaded from www.Manualslib.com manuals search engine ViviCam 7020 Digital Camera
User Manual


© 2010 Sakar International, Inc. All rights reserved.
W indows and the W indows logo are registered trademarks of Microsoft Corporation.
All other trademarks are the property of their respective companies.
Page 2
Downloaded from www.Manualslib.com manuals search engine  1
Table of Contents
Introduction ..................................................................................................................................................... 2
Key Features .................................................................................................................................................. 2
W hat‟s Included...
Page 3
Downloaded from www.Manualslib.com manuals search engine 2 Introduction Thank you f or purchasing the ViviCam 7020 Digital Camera. Everything you need to take quality digital photos and videos is included with your camera. Please read this manual carefully first in order to get the most out of your digital camera. Key Features Digital Image Resolution- 7M, 5M, 3M, 2M, VGA. Support s an SD memory card (not included) up to 32GB. 1.8 inch TFT Color LCD Vivitar Experience Image...
Page 4
Downloaded from www.Manualslib.com manuals search engine 3 Computer System Requirements for WINDOWS OS To be able to download photos to your PC, you will need the f ollowing minimum configuration: Microsoft® Windows XP with Service Pack 3, W indows Vista with Service Pack 1 or W indows 7 Pentium® 4 processor (or above) 512 MB of RAM, with 250 MB of free hard disk space 16-bit Color monitor, 1024 X 768 recommended screen resolution CD-ROM Drive QuickTime® 6 or higher Microsoft®...
Page 6
Downloaded from www.Manualslib.com manuals search engine  5
Preparing Your Camera for Use
Battery Installation
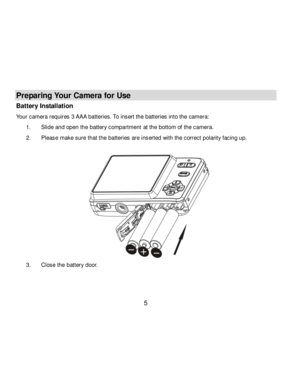
Your camera requires 3 AAA batteries. To insert the batteries into the camera:
1. Slide and open the battery compartment at the bottom of the camera.
2. Please make sure that the batteries are inserted with the correct polarity facing up.


3. Close the battery door.
Page 7
Downloaded from www.Manualslib.com manuals search engine  6
When the “No Power” is displayed on the LCD, this indicates that your camera has an insufficient battery
power level and will be automatically powered off.  You need to  download the sample photos and  videos
to your PC.    If there is no SD card inserted bef ore it powers off the photos and videos will be lost.

Note:
1. If you don‟t intend to use your camera f or an extended period of time, please remove the
batteries to avoid battery...
Page 8
Downloaded from www.Manualslib.com manuals search engine  7
Installing SD Memory Card
Your camera has a memory card slot that enables you to insert an “SD” compatible memory card. Adding
a  memory  card is  needed  f or  normal  use  and will  allow  you  to  increase  the  capacity  of  your  camera
bef ore you have to transfer photos and videos to your PC. Install the SD memory card as below:
1. Locate the Memory Card slot.
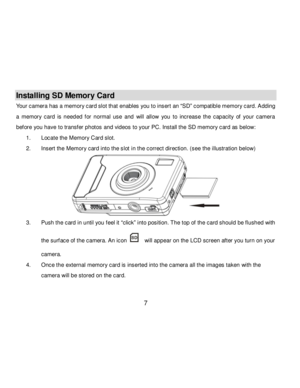
2. Insert the Memory card into the slot in the correct direction. (see...
Page 9
Downloaded from www.Manualslib.com manuals search engine  8
Note:
1. An external memory card is required f or normal use. Your camera supports a compatible SD
memory card (up to 32GB).
2. An SD Memory Card is not included and needs to be purchased separately.
3. “Card inserted, change to card” will appear on the LCD screen when you insert the card
indicating that photos and videos will now be stored on the SD memory card. Reversely, “Card
removed, change to internal memory” will appear on the LCD...
Page 10
Downloaded from www.Manualslib.com manuals search engine  9
Powering Your Camera On/Off
1. Press and hold the Power button to turn on your camera.
The LCD screen will light up indicating that your camera is on and ready f or use.
2. To power off your camera, press and hold the Power button again f or about 3 seconds.


Photo Capture Mode
TAKING PHOTOS
After you power on your camera, the def ault mode is Camera/Photo Capture mode.
A camera icon appears in the top left corner of  the LCD screen....
