Vivitar 10x25 User Manual
Here you can view all the pages of manual Vivitar 10x25 User Manual. The Vivitar manuals for Digital Camera are available online for free. You can easily download all the documents as PDF.
Page 2
Limited One  Year  Warran ty
-1- V
ivitar w arran ts this qualit y produc t to b e free of def ects in ma ter ial and w orkmanship f or a
p er iod of one y ear from the da te of pur chase.  D uring the p eriod ,  V ivitar will r epair or replace the
pr oduc t at no char ge for par ts or lab or.
TIME PERIOD OF  THIS WARR ANT Y
T he time p eriod of this w arran ty star ts from the da te of the or iginal purchase and e xpires on the
first anniv ersary date of pur chase.
WHA T IS NO T COVERED BY  THIS...
Page 3
WHAT TO DO  WHEN SER VICE IS NEEDED
-2-
STEP 1.
  Pack age the pr oduc t and r elevan t acc essor ies car efully, using ample padding ma ter ials
and a stur dy mailing c ontainer t o preven t damage in tr ansit.
STEP 2.  Include in pack age:
a) E videnc e of da te and plac e of original pur chase (for example , a c opy of y our sales r eceipt).
b) D etailed descr iption of your problem.
c)  When p ossible , a sample e videncing the pr oblem.
STEP 3.  Retur n item (insur ed) to:  V ivitar...
Page 4
Table of C onten ts
-3- What your camera includes:.............................................................\
........................... 4
Computer System Requirements .....................................................................\
........ 4
A Quick Look at Your Camera.......................................................................\
.............. 5
Preparing Your Camera for Use .....................................................................\
.............6
Starting...
Page 5
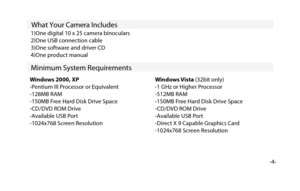
What Your Camera Includes
-4-
  1)One digital 10 x 25 camera binoculars
2)One USB connection cable
3)One software and driver CD
4)One product manual
Minimum System Requirements
Windows 2000, XP
-Pentium III Processor or Equivalent
-128MB RAM
-150MB Free Hard Disk Drive Space
-CD/DVD ROM Drive
-Available USB Port
-1024x768 Screen Resolution
Windows Vista (32bit only)
-1 GHz or Higher Processor
-512MB RAM
-150MB Free Hard Disk Drive Space
-CD/DVD ROM Drive
-Available USB Port
-Direct X 9 Capable Graphics...
Page 6
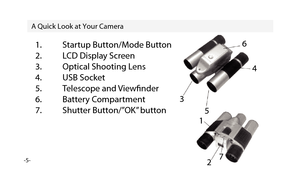
A Quick Look at Your Camera
-5-
64
5
3
1
2 7
1.  Startup Button/Mode Button
2.  LCD Display Screen
3.  Optical Shooting Lens
4.  USB Socket
5.  Telescope and Viewfnder
6.  Battery Compartment
7.  Shutter Button/”OK” button
Page 7
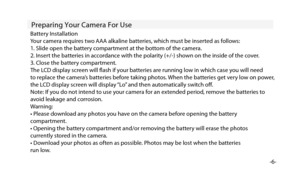
Preparing Your Camera For Use
-6-
Battery Installation
Your camera requires two AAA alkaline batteries, which must be inserted as follows:
1. Slide open the battery compartment at the bottom of the camera.
2. Insert the batteries in accordance with the polarity (+/-) shown on the inside of the cover.
3. Close the battery compartment.
The LCD display screen will fash if your batteries are running low in which case you will need
to replace the camera’s batteries before taking photos. When the batteries...
Page 8
Starting Your Camera
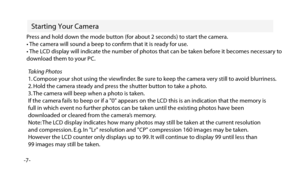
-7-Press and hold down the mode button (for about 2 seconds) to start the camera.
• The camera will sound a beep to confirm that it is ready for use.
• The LCD display will indicate the number of photos that can be taken before it becomes necessary to
download them to your PC.
Taking Photos
1. Compose your shot using the viewfinder. Be sure to keep the camera very still to avoid blurriness.
2. Hold the camera steady and press the shutter button to take a photo.
3. The camera will...
Page 9
The Camera’s Modes
-8-
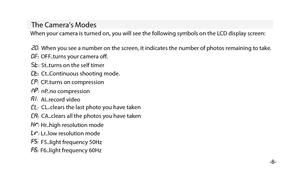
When your camera is turned on, you will see the following symbols on the LCD display screen:When you see a number on the screen, it indicates the number of photos remaining to take.
OFF..turns your camera of.
St..turns on the self timer
Ct..Continuous shooting mode.
CP..turns on compression
nP..no compression
AI..record video CL..clears the last photo you have taken
CA..clears all the photos you have taken
Hr..high resolution mode
Lr..low resolution mode
F5..light frequency 50Hz...
Page 10
Operating Your Camera
-9-If the camera is powered of, hold down the mode button once to turn on power to your camera.
Turning  your Camera Of
1. Press the mode button repeatedly until the OFF symbol shows on the LCD display screen.
2. Press the shutter button within 5 seconds to turn camera of.
Auto-Shoot Mode
1. Press the mode button repeatedly until the  ST symbol shows on on the LCD display screen.
2. Press the shutter button within 5 seconds to activate the 10 second timer.
3. The camera will beep...
