Sony DPP FP55 User Manual
Here you can view all the pages of manual Sony DPP FP55 User Manual. The Sony manuals for Printer are available online for free. You can easily download all the documents as PDF.
Page 1
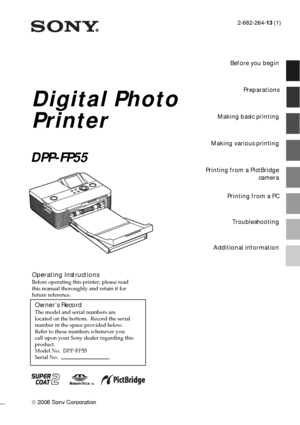
2-682-264-13 (1) 2006 Sony Corporation Operating InstructionsBefore operating this printer, please read this manual thoroughly and retain it for future reference. Owner’s RecordThe model and serial numbers are located on the bottom. Record the serial number in the space provided below. Refer to these numbers whenever you call upon your Sony dealer regarding this product. Model No. DPP-FP55 Serial No. Digital Photo Printer DPP-FP55 Before you begin Preparations Making basic printing Making various...
Page 2
2 GB
WARNING
To reduce fire or shock hazard, do not
expose the unit to rain or moisture.
For the customers in the U.S.A.
CAUTION
You are cautioned that any changes or
modifications not expressly approved in this
manual could void your authority to operate this
equipment.
If you have any questions about this product, you
may call:
Sony Customer Information Services Center
1-800-222-SONY (7669)
The number below is for the FCC related
matters only.
Regulatory Information
  Declaration of Conformity
Trade...
Page 3
3 GB
Notes on LCD screen
•The displayed image on the screen is not
identical in picture quality and colors with the
printed image because phosphor methods or
profiles differ. Please regard the displayed
image as just a reference.
•Do not press against the LCD screen. The
screen may be discolored and that may cause a
malfunction.
•Exposing the LCD screen to direct sunlight for
long periods may cause malfunctions.
•The LCD screen is manufactured using
extremely high-precision technology so over
99.99% of...
Page 4
4 GB
Table of contents
Before you begin
What you can do with this printer .......... 6
Identifying the parts ............................... 8
Preparations
1Checking the contents of
the package .................................... 10
2Preparing the print pack ................. 11
Size of print paper ................................... 11
Optional print packs ................................ 11
3Loading the print cartridge ............. 12
4Inserting the print paper ................. 13
5Connecting the AC...
Page 5
5 GB
Making various printing
Editing an image .................................. 26
Displaying the Edit menu ......................... 26
Enlarging and reducing an image size ...... 27
Moving an image .................................... 27
Rotating an image ................................... 27
Adjusting an image ................................. 28
Adding a special filter to an image .......... 28
Reducing the red-eye phenomenon .......... 29
Printing and saving an image .................. 30
Making...
Page 6
6 GB
Before you begin
What you can do with this printer
You can print from a memory
card or an external device
.pages 20 to 25
Digital Camera
or other
external device“Memory Stick”
(“Memory Stick Duo”),
or SD card
You can print using the
printer‘s LCD screen
You can select and print an image
.page 20
You can print from a
PictBridge-compliant camera
.page 46
You can print from a PC
.pages 47 to 61
Basic one-image
print
You can make a variety of printing
.pages 26 to 36
Enlarged/Reduced/
Moved/Rotated...
Page 7
7 GB
Before you begin
Convenient printing operations
xEasy-to-view, 2.0 type color TFT liquid
crystal display allows you to preview,
edit, process, save, and print an image
easily. In addition, guide messages will
navigate you through the operations.
xHigh-speed CPU greatly shortens the
time required for displaying and
printing an image.
xA 20-sheet paper tray allows you to
print up to 20 sheets of paper at one
time. (.page 13)
Versatility of printing
xYou can select border or borderless
prints (.page...
Page 8
8 GB
Identifying the parts
For details, see the pages indicated in the
parentheses.
Printer front panel
11 (on/standby) switch/indicator
(pages 16, 20)
2MENU button
3
 (zoom out)/ (zoom in) buttons
(page 24)
4LCD screen (page 24)
5Direction (f/F/g/G) buttons
6ENTER button
7PRINT button/indicator (page 21)
8CANCEL button
9Access indicator (pages 17, 18)
0Paper tray compartment door
(page 15)
qaPaper tray compartment (page 15)
qsSD CARD slot (pages 18)
qdMEMORY STICK PRO STD/DUO slot
(page 17)
Printer...
Page 9
9 GB
Before you begin
Printer rear panel
1Ventilation holes
2DC IN 24V jack (page 16)
Connect the supplied AC power adaptor
into this connector.
Printer left side panel
3 USB connector (page 49)When using the printer in PC mode,
connect a PC into this connector.
4PictBridge connector
(pages 19, 46)
Paper tray
1Paper eject tray (pages 13, 14)
2Paper tray lid (pages 13, 14)
Downloaded From ManualsPrinter.com Manuals
Page 10
10 GB
Preparations
1Checking the
contents of the
package
Make sure that the following accessories
are supplied with your printer.
Paper tray (1)
AC adaptor (AC-S2425) (1)
AC power cord * (1)
*The AC power cord illustrated is for 120V
only.  The plug shape and specifications of
the AC power cord differ depending on the
region you purchased the printer.
Cleaning cartridge (1)
CD-ROM (1)
–Sony DPP-FP55 Printer Driver
Software for Windows® XP
Professional/Windows® XP Home
Edition/Windows® 2000...


