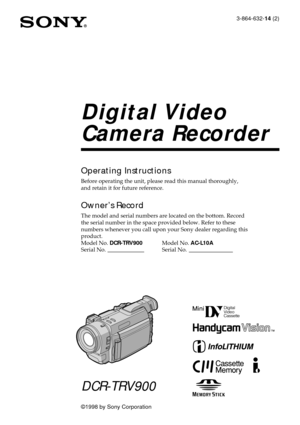
Sony Digital Video Camera Recorder DCR-TRV900 Operating Instructions
Here you can view all the pages of manual Sony Digital Video Camera Recorder DCR-TRV900 Operating Instructions. The Sony manuals for Camcorder are available online for free. You can easily download all the documents as PDF.
Page 1
3-864-632-14 (2)
©1998 by Sony Corporation
DCR-TRV900
Digital Video
Camera Recorder
Operating Instructions
Before operating the unit, please read this manual thoroughly,
and retain it for future reference.
OwnerÕs Record
The model and serial numbers are located on the bottom. Record
the serial number in the space provided below. Refer to these
numbers whenever you call upon your Sony dealer regarding this
product.
Model No. DCR-TRV900Model No. AC-L10A
Serial No. Serial No.
Page 2
2
RISK OF ELECTRIC SHOCK
DO NOT OPEN
CAUTION :  TO REDUCE THE RISK OF ELECTRIC SHOCK,
DO NOT REMOVE COVER (OR BACK).
NO USER¥SERVICEABLE PARTS INSIDE.
REFER SERVICING TO QUALIFIED SERVICE PERSONNEL.
CAUTION
For the Customers in the U.S.A.
CAUTIONYou are cautioned that any changes or modifications not
expressly approved in this manual could void your
authority to operate this equipment.
Note:This equipment has been tested and found to comply
with the limits for a Class B digital device, pursuant to
Part...
Page 3
3
Before you begin
Table of contents
Before you begin
Using this manual .............................................. 4
Checking supplied accessories ........................ 6
Getting started
Installing and charging the battery pack ....... 7
Inserting a cassette ........................................... 11
Basic operations
Camera recording ............................................ 12
Attaching the lens hood ........................... 14
Using the zoom feature ............................ 14...
Page 4
4
Before you begin
Using this manual
As you read through this manual, buttons and settings on the camcorder are shown in
capital letters.
e.g., Set the POWER switch to CAMERA.
Note on Cassette Memory
This camcorder is based on the DV format. You can only use mini DV cassettes with this
camcorder. We recommend you to use a tape with cassette memory .
The functions which depend on whether the tape has the cassette memory or not are:
¥ End Search (p. 21, 24)
¥ Date Search (p. 74)
¥ Photo Search (p. 77).
The...
Page 5
5
Before you begin
Precautions on camcorder care
¥The LCD screen and/or the color viewfinder are manufactured using high-precision
technology. However, there may be some tiny black points and/or bright points (red,
blue or green in color) that constantly appear on the LCD screen and/or in the
viewfinder. These points are normal in the manufacturing process and do not affect
the recorded picture in any way. Over 99.99% are operational for effective use.
¥ Do not let the camcorder get wet. Keep the...
Page 6
6
Check that the following accessories are supplied with your camcorder.
Checking supplied accessories
1Wireless Remote Commander (1) (p. 139)
2AC-L10A AC power adaptor (1),
Power cord (1) (p. 8, 25)
The shape of the plug varies from region to
region.
3NP-F330 battery pack (1) (p. 7)
4Size AA (R6) battery for Remote
Commander (2) (p. 139)5Floppy disk adapter (1) (p. 91)
6A/V connecting cable (1) (p. 70, 82)
7Shoulder strap (1) (p. 140)
8Lens cap (1) (p. 12)
9Lens hood (1) (p. 14)
Contents of the...
Page 7
7
Getting started
Getting started
Installing and charging the battery pack
Before using your camcorder, you first need to install and charge the battery pack.  To
charge the battery pack, use the supplied AC power adaptor.
This camcorder operates only with the ÒInfoLITHIUMÓ battery pack.
ÒInfoLITHIUMÓ is a trademark of Sony Corporation.
Installing the battery pack
(1)Lift up the viewfinder.
(2)Insert the battery pack in the direction of the $ mark on the battery pack. Slide the
battery pack down until it...
Page 8
8
Notes
¥ ÒÐ Ð Ð minÓ appears on the display window until the camcorder calculates remaining
battery time.
¥ Remaining battery time indication on the display window roughly indicates the recording
time with the viewfinder. Use it as a guide. It may differ from the actual recording time.
Installing and charging the battery pack
Charging the battery pack
Charge the battery pack on a flat surface without vibration. The battery pack is charged a
little in the factory.
(1)Open the DC IN jack cover and connect...
Page 9
9
Getting started
Battery life
While using with viewfinder
Battery pack Continuous recording time * Typical recording time **
NP-F330 (supplied) 75 (70) 40 (35)
NP-F530 120 (110) 60 (55)
NP-F550 150 (135) 75 (70)
NP-F730 270 (245) 140 (130)
NP-F750/NP-F730H*** 315 (275) 165 (145)
NP-F930 420 (375) 220 (195)
NP-F950 485 (440) 255 (230)
While using with LCD
Battery pack Continuous Typical Playing
recording time * recording time ** time with LCD
NP-F330 (supplied) 60 (50) 30 (25) 75 (70)
NP-F530 95 (85) 50...
Page 10
10
Installing and charging the battery pack
Notes on remaining battery time indication during recording
¥ Remaining battery time is displayed on the LCD screen or in the viewfinder.  However, the
indication may not be displayed properly, depending on using conditions and
circumstances.
¥ When you close the LCD panel or open it, it takes about 1 minute for the correct remaining
time to be displayed.
To remove the battery packLift up the viewfinder. While pressing  BATT RELEASE, slide the battery pack in...


