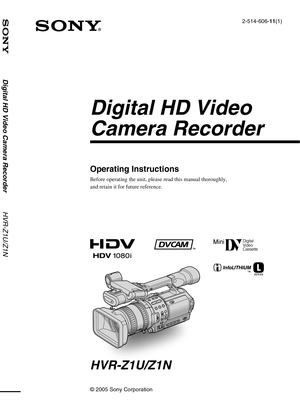
Sony Digital HD Video Camera Recorder HVR-Z1U/Z1N Operating Instructions
Here you can view all the pages of manual Sony Digital HD Video Camera Recorder HVR-Z1U/Z1N Operating Instructions. The Sony manuals for Camcorder are available online for free. You can easily download all the documents as PDF.
Page 1
Digital HD Video Camera Recorder          HVR-Z1U/Z1N
© 2005 Sony Corporation
2-514-606-11(1)
Digital HD Video
Camera Recorder
HVR-Z1U/Z1N
Operating Instructions
Before operating the unit, please read this manual thoroughly,
and retain it for future reference.
Page 2
2
Read this first
WARNING
To prevent fire or shock hazard, do not
expose the unit to rain or moisture.
This symbol is intended to alert the
user to the presence of uninsulated
“dangerous voltage” within the
product’s enclosure that may be of
sufficient magnitude to constitute
a risk of electric shock to persons.
This symbol is intended to alert the
user to the presence of important
operating and maintenance
(servicing) instructions in the
literature accompanying the
appliance.
For customers in...
Page 3
3
Owner’s Record
The model and serial numbers are located on the
bottom. Record the serial number in the space
provided below. Refer to these numbers whenever
you call upon your Sony dealer regarding this
product.
Model No.HVR-
Serial No.                                                            Model No.AC-                                                     Serial No.
CAUTION
You are cautioned that any...
Page 4
4
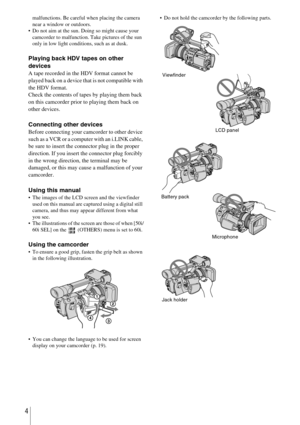
malfunctions. Be careful when placing the camera
near a window or outdoors.
 Do not aim at the sun. Doing so might cause your
camcorder to malfunction. Take pictures of the sun
only in low light conditions, such as at dusk.
Playing back HDV tapes on other
devices
A tape recorded in the HDV format cannot be
played back on a device that is not compatible with
the HDV format.
Check the contents of tapes by playing them back
on this camcorder prior to playing them back on
other devices.
Connecting...
Page 5
5
Read this first .............................................................................................  2
Quick Start Guide
Recording movies ......................................................................................  8
Getting started
Step 1: Checking supplied items ..............................................................  10
Step 2: Charging the battery pack............................................................  11
Using an outside power source...
Page 6
6
Customizing the picture quality – PICTURE PROFILE ............................  34
Customizing the sound.............................................................................  37
Adjusting the audio recording level – Microphone volume level  ................................ 37
Connecting external audio sources  ........................................................................... 38
Selecting the recording channel...
Page 7
7
Advanced operations
Using the Menu
Selecting menu items ......................... 57
Using the   (CAMERA SET) menu
– STDYSHOT TYP/FRAME REC,
etc. ............................................... 58
Using the   (AUDIO SET) menu

– INT MIC SET/XLR SET, etc.  ..... 64
Using the   (LCD/VF SET) menu

– LCD COLOR, etc.  ..................... 68
Using the   (IN/OUT REC) menu

– REC FORMAT/DOWN CONVERT,
etc. ............................................... 70
Using the   (TC/UB SET) menu

– TC MAKE, etc....
Page 8
Quick Start Guide8
Quick Start Guide
Recording movies
1Attach the charged battery pack to the camcorder.
To charge the battery, see page 11.
2Insert a cassette into the camcorder.
Press the battery pack and slide it down.
aSlide the OPEN/
EJECT  lever in
the direction of the
arrow to open the lid.
The cassette compartment
comes out automatically.
bInsert the cassette with
its window-side facing
out, then push the center
of the back of the
cassette.cPress  on the
cassette
compartment.
Close the...
Page 9
Quick Start Guide
Quick Start Guide
9
3Start recording while checking the subject on the LCD screen.
The date and time is not set up in the default setting. To set the date and time, see page 16.
The pictures are recorded in the HDV format in the default setting. To record in the DVCAM or
DV format, see page 20.
4View the recorded picture on the LCD screen.
aOpen the hood shutter.
bOpen the LCD panel and
adjust the angle.
cWhile pressing the green
button, set the POWER
switch to CAMERA.
dPress REC...
Page 10
Getting started10
Getting started
Step 1: Checking
supplied items
Make sure you have following items supplied
with your camcorder.
The number in parentheses indicates the number
of that item supplied.
AC Adaptor/charger (1)
Power cord (1)
Connecting cord (DK-415) (1)
Lens hood (1)
This is attached to your camcorder.
bNote
 If you attach an optical filter (optional) or so, remove
the lens hood.
Large eyecup (1)
To attach it to your camcorder, see page 16.
Wireless Remote Commander (1)
A/V connecting...


