Sony A 230 Manual
Here you can view all the pages of manual Sony A 230 Manual. The Sony manuals for Camera are available online for free. You can easily download all the documents as PDF.
Page 1
DSLR-A230 4-147-790-11 (1)
Printed using VOC (Volatile Organic Compound)-free vegetable oil based ink.
Additional information on this product and answers to frequently asked questions can be found at our Customer Support Website.
Digital Single Lens Reflex CameraInstruction Manual
DSLR-A230
Preparing the camera
Before your operation
Shooting images
Using the shooting function
Using the viewing function
Changing your setup
Viewing images on a computer
Printing images
Page 2
2
Owner’s RecordThe model and serial numbers are located
on the bottom.
Record the serial number in the space
provided below.
Refer to these numbers whenever you call
upon your Sony dealer regarding this
product.
Model No. DSLR-A230
Serial No. __________________________
To reduce fire or shock hazard, do
not expose the unit to rain or
moisture.IMPORTANT SAFETY
INSTRUCTIONS
SAVE THESE
INSTRUCTIONS.
DANGER - TO
REDUCE THE RISK
OF FIRE OR
ELECTRIC SHOCK,
CAREFULLY
FOLLOW THESE
INSTRUCTIONS.
If...
Page 3
3
 Keep the battery pack out of the reach of
small children.
 Keep the battery pack dry.
 Replace only with the same or equivalent
type recommended by Sony.
 Dispose of used battery pack promptly
described the instructions.
Battery chargerEven if the CHARGE lamp is not lit, the
battery charger is not disconnected from the
AC power source (mains) as long as it is
connected to the wall outlet (wall socket).
If some trouble occurs while using the
battery charger, immediately shut off the
power by...
Page 4
4
Note:This equipment has been tested and found
to comply with the limits for a Class B
digital device, pursuant to Part 15 of the
FCC Rules.
These limits are designed to provide
reasonable protection against harmful
interference in a residential installation.
This equipment generates, uses, and can
radiate radio frequency energy and, if not
installed and used in accordance with the
instructions, may cause harmful
interference to radio communications.
However, there is no guarantee that...
Page 5
5
Disposal of Old Electrical &
Electronic Equipment (Applicable in
the European Union and other
European countries with separate
collection systems)
This symbol on the product or on its
packaging indicates that this product shall
not be treated as household waste. Instead it
shall be handed over to the applicable
collection point for the recycling of
electrical and electronic equipment. By
ensuring this product is disposed of
correctly, you will help prevent potential
negative consequences...
Page 6
6
A moulded plug complying with BS 1363
is fitted to this equipment for your safety
and convenience.
Should the fuse in the plug supplied need to
be replaced, a fuse of the same rating as the
supplied one and approved by ASTA or
BSI to BS 1362, (i.e., marked with an   or
 mark) must be used.
If the plug supplied with this equipment has
a detachable fuse cover, be sure to attach
the fuse cover after you change the fuse.
Never use the plug without the fuse cover.
If you should lose the fuse...
Page 7
7
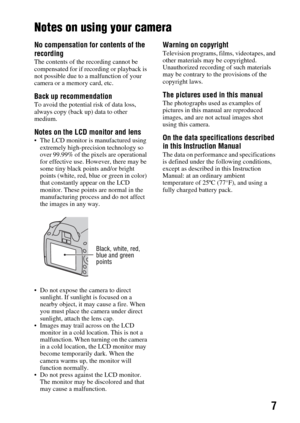
Notes on using your camera
No compensation for contents of the
recording
The contents of the recording cannot be
compensated for if recording or playback is
not possible due to a malfunction of your
camera or a memory card, etc.
Back up recommendationTo avoid the potential risk of data loss,
always copy (back up) data to other
medium.
Notes on the LCD monitor and lens The LCD monitor is manufactured using
extremely high-precision technology so
over 99.99% of the pixels are operational
for...
Page 8
8
Table of Contents
Notes on using your camera  .............................................. 7
Preparing the
cameraChecking the accessories supplied .................................. 11
Preparing the battery pack  ............................................... 12
Attaching a lens  ............................................................... 18
Inserting a memory card  .................................................. 20
Preparing the camera...
Page 9
9
Shooting an image the way you want it (Exposure mode)
..................................................................................... 58
 Shooting with program auto  .................................. 60
 Shooting by controlling the blur of the background
(Aperture priority)  ............................................. 61
 Shooting a moving subject with various expressions
(Shutter speed priority)  ..................................... 63
 Shooting with the exposure adjusted manually
(Manual...
Page 10
10
Image processing  ............................................................. 86
Correcting the brightness of the image (D-Range
Optimizer) ......................................................... 86
Selecting your desired image processing (Creative Style)
............................................................................ 86
Changing the range of color reproduction (Color Space)
............................................................................ 88
 Selecting the drive mode...


