Singer Rotomatic 8 Manual
Here you can view all the pages of manual Singer Rotomatic 8 Manual. The Singer manuals for Sewing Machine are available online for free. You can easily download all the documents as PDF.
Page 2
5, 6, 8, 10 Stitch Sewing Machine
Table of Contents
1. Getting To Know Your Machine
Principal Parts
Accessories
Important Safety Instructions

2. Getting Ready To Sew
Operating the Machine
Choosing and Changing Needles
Changing Presser Feet
Changing the Needle Plate
Attaching the Feed Cover
Removing and Replacing the
Extension Table
Fabric Thread and Needle Table
Winding a Bobbin
Inserting a Bobbin
Threading the Machine
Raising the Bobbin Thread

3. Straight Stitching
Stitch Width Selector
Needle...
Page 3
5, 6, 8, 10 Stitch Sewing Machine
Congratulations

As the owner of a new Singer sewing
machine, you are about to begin an exciting
adventure in creativity. From the moment you
first use your machine, you will know you are
sewing on one of the easiest to use sewing
machines ever made.

In addition to the many familiar SINGER
exclusives, like a removable extension table
and a horizontal spool pin, this machine offers
you these features:

* Zig-zag stitching for buttonholes, mending
and...
Page 4
5, 6, 8, 10 Stitch Sewing Machine
Dear Customer,

We recommend that for future reference you record the
Serial Number of your Sewing Machine in the space
provided.

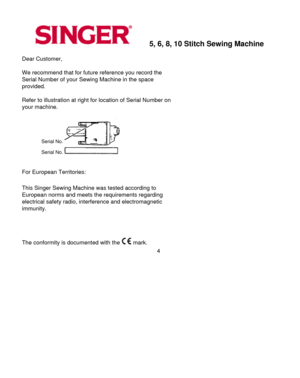
Refer to illustration at right for location of Serial Number on
your machine.

Serial No.
Serial No.
For European Territories:
This Singer Sewing Machine was tested according to
European norms and meets the requirements regarding
electrical safety radio, interference and electromagnetic
immunity.

The conformity is documented with...
Page 5
5, 6, 8, 10 Stitch Sewing Machine
1 Getting to know your machine

Principal parts

1. Hand wheel
2. Bobbin winder
3. Pattern selector lever (only for machines with
5, 6, 8 and 10 stitches)

4. Horizontal spool pin and holder
5. Needle position selector
6. Stitch width lever
7. Snap-in thread guide
8. Bobbin winder tension disc
9. Thread guide
10. Take up lever
11. Face plate
12. Needle thread tension dial
13. Thread guides
14. Snap on presser foot
15. Feed system
16. Needle plate...
Page 6
5, 6, 8, 10 Stitch Sewing Machine
Accessories

The following accessories furnished with your sewing
machine are designed to simplify your sewing projects
and increase the versatility of your machine.


The letter in a circle adjacent to the illustrated part is
reproduced on the part itself to help you select the
correct attachment for the type of work you are doing.


1. Special purpose presser foot (J) is used for
decorative and zig-zag sewing. (only for machines
with 5, 6, 8 and 10...
Page 7
5, 6, 8, 10 Stitch Sewing Machines
Accessories Continued...

8. Feed cover (F) is used to prevent the feed from
moving the fabric when darning or free motion
embroidery.


9. Transparent bobbins for easy viewing of thread
supply


10. Blindstitch hem presser foot is used to position
the hem for blindstitch hemming. (only for machines
with 5, 6, 8 and 10 stitches)


11. Twin needle and spool pin are used to stitch two
parallel rows of decorative stitching simultaneously.
When using...
Page 8
5, 6, 8, 10 Stitch Sewing Machine
IMPORTANT SAFETY INSTRUCTIONS

When using this machine, basic safety precautions
should always be followed including the following:


Read all instructions before using this machine.

DANGER - To reduce the risk of electric shock:

* The machine should never be left unattended when
plugged in. Always unplug the machine from the
electric outlet immediately after using and before
cleaning.


* Always unplug before re-lamping. Replace bulb with
the same...
Page 9
5, 6, 8, 10 Stitch Sewing Machines
IMPORTANT SAFETY INSTRUCTIONS
continued...

* Never operate the machine with any air openings
blocked. Keep ventilation openings of the machine
and foot controller free from the accumulation of lint,
dust, and loose cloth.


* Never drop or insert any object into any opening.

* Do not use outdoors.

* Do not operate where aerosol (spray) products are
being used or where oxygen is being administered.


* Do not allow to be used as a toy. Close...
Page 10
5, 6, 8, 10 Stitch Sewing Machine
2 Getting ready to sew
Operating the machine
Connecting the machine
Push plug (1) into the receptacle (2) at the right end of
the machine. Then connect plug (3) to your socket
outlet.


For North America
This appliance has a polarized (one blade wider than
the other). To reduce the risk of electric shock, this
plug is intended to m in a polarized outlet only one
way.


If the plug does not fit fully in the outlet, reverse the
plug. If it still does not...


