Sharp AR 5516 User Manual
Here you can view all the pages of manual Sharp AR 5516 User Manual. The Sharp manuals for Printer are available online for free. You can easily download all the documents as PDF.
Page 1
MODEL: AR-5516
AR-5520
AR-5516D
AR-5520D
DIGITAL MULTIFUNCTIONAL SYSTEM
OPERATION GUIDE
Downloaded From ManualsPrinter.com Manuals
Page 3
1
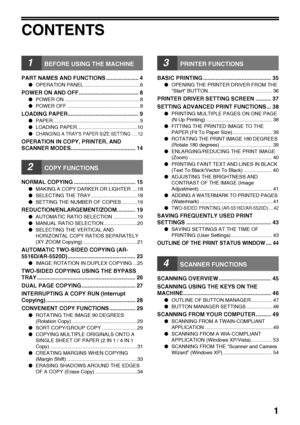
CONTENTS
1BEFORE USING THE MACHINE
PART NAMES AND FUNCTIONS ..................... 4
●OPERATION PANEL ........................................6
POWER ON AND OFF....................................... 8
●POWER ON ......................................................8
●POWER OFF ....................................................8
LOADING PAPER.............................................. 9
●PAPER ..............................................................9
●LOADING...
Page 4
2
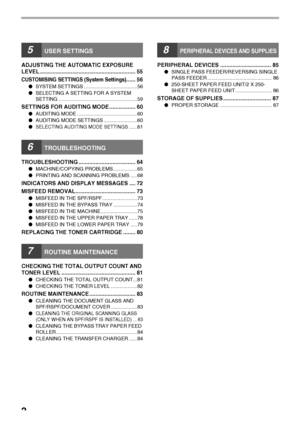
5USER SETTINGS
ADJUSTING THE AUTOMATIC EXPOSURE
LEVEL .............................................................. 55
CUSTOMISING SETTINGS (System Settings)...... 56
●SYSTEM SETTINGS ......................................56
●SELECTING A SETTING FOR A SYSTEM
SETTING ........................................................59
SETTINGS FOR AUDITING MODE ................. 60
●AUDITING MODE ...........................................60
●AUDITING MODE SETTINGS ........................60
●
SELECTING...
Page 5
3
INTRODUCTION
This manual describes the copier, printer, and scanner functions of the AR-5516/AR-5520 and
AR-5516D/AR-5520D digital multifunctional system.
• Where AR-XXXX appears in this manual, please substitute the name of your model for XXXX. For the name
of your model, see DIFFERENCES BETWEEN MODELS in the Start Guide.
 The screen images and procedures that appear in this manual are mainly for Windows Vista. With other
versions of Windows, some screen images may be different from those in this...
Page 6
4
1
Chapter 1
BEFORE USING THE MACHINE
This chapter contains basic information that should be read before using the machine.
PART NAMES AND FUNCTIONS
Glass cleaner (when the SPF/RSPF is installed)
Use to clean the original scanning glass. (p.83)
Document feeder cover (when the SPF/RSPF is
installed) /document cover
Open to make copies from the document glass.
(p.15)
Document glass
Place an original that you wish to scan face down
here. (p.15)
Handles
Use to move the machine.
Power switch
Press to turn...
Page 7
5
BEFORE USING THE MACHINE
1
Document feeder tray (when the SPF/RSPF is
installed)
Place the original(s) that you wish to scan face up
here. Holds up to 40 originals. (p.17)
Original guides (when the SPF/RSPF is
installed)
Adjust to the size of the originals. (p.16)
Feeding roller cover (when the SPF/RSPF is
installed)
Open to remove misfed originals. (p.73)
Right side cover (when the SPF/RSPF is
installed)
Open to remove misfed originals. (p.73)
Exit area (when the SPF/RSPF is installed)
Originals...
Page 8
6
BEFORE USING THE MACHINE
OPERATION PANEL
SCAN MENU key
Use to scan by means of the provided Button
Manager software. (p.48)
SCAN key ( ) / indicator
Press to switch the machine to scanner mode and
scan by means of the provided Button Manager
software. (p.46) The indicator blinks during
scanning and transmission of the scanned data.
ON LINE key ( ) / indicator
Press to toggle the machine between online and
off-line. The indicator lights up when the machine
is online, and goes off when the machine...
Page 9
7
BEFORE USING THE MACHINE
1
Display
Shows the set number of copies, as well as the copy
ratio, system setting function or setting code, or an
error code when an error occurs.
Numeric keys
Use to select the desired copy quantity or to make
system setting entries. (p.19)
To display the total number of pages output by the
machine, hold the [0] key down. (p.81)
CLEAR key ( )
Clears the copy quantity display or terminates a
copy run.
INTERRUPT key ( ) / indicator
Interrupts a copy run. (p.28)
Light and...
Page 10
8
POWER ON AND OFF
The power switch is located on the left side of the machine.
POWER ON
Turn the power switch to the ON
position.
It will take about 45
seconds for the machine
to warm up. While the
machine is warming up,
the POWER SAVE
indicator ( ) will blink.
(The POWER SAVE
indicator ( ) will go off
when the machine is
ready to copy.)
However, you can make desired settings and press
the [START] key ( ) during warm-up. Copying will
start after warm-up.
POWER OFF
Make sure that the machine...


![Page 9
7
BEFORE USING THE MACHINE
1
Display
Shows the set number of copies, as well as the copy
ratio, system setting function or setting code, or an
error code when an error occurs.
Numeric keys
Use to select the desired copy quantity or to make
system setting entries. (p.19)
To display the total number of pages output by the
machine, hold the [0] key down. (p.81)
CLEAR key ( )
Clears the copy quantity display or terminates a
copy run.
INTERRUPT key ( ) / indicator
Interrupts a copy run. (p.28)
Light and... Page 9
7
BEFORE USING THE MACHINE
1
Display
Shows the set number of copies, as well as the copy
ratio, system setting function or setting code, or an
error code when an error occurs.
Numeric keys
Use to select the desired copy quantity or to make
system setting entries. (p.19)
To display the total number of pages output by the
machine, hold the [0] key down. (p.81)
CLEAR key ( )
Clears the copy quantity display or terminates a
copy run.
INTERRUPT key ( ) / indicator
Interrupts a copy run. (p.28)
Light and...](http://img.usermanuals.tech/thumb/68/37849/w300_Sharp_AR-5516-8.png)
![Page 10
8
POWER ON AND OFF
The power switch is located on the left side of the machine.
POWER ON
Turn the power switch to the ON
position.
It will take about 45
seconds for the machine
to warm up. While the
machine is warming up,
the POWER SAVE
indicator ( ) will blink.
(The POWER SAVE
indicator ( ) will go off
when the machine is
ready to copy.)
However, you can make desired settings and press
the [START] key ( ) during warm-up. Copying will
start after warm-up.
POWER OFF
Make sure that the machine... Page 10
8
POWER ON AND OFF
The power switch is located on the left side of the machine.
POWER ON
Turn the power switch to the ON
position.
It will take about 45
seconds for the machine
to warm up. While the
machine is warming up,
the POWER SAVE
indicator ( ) will blink.
(The POWER SAVE
indicator ( ) will go off
when the machine is
ready to copy.)
However, you can make desired settings and press
the [START] key ( ) during warm-up. Copying will
start after warm-up.
POWER OFF
Make sure that the machine...](http://img.usermanuals.tech/thumb/68/37849/w300_Sharp_AR-5516-9.png)