Samsung CHG90 User Manual
Here you can view all the pages of manual Samsung CHG90 User Manual. The Samsung manuals for Monitor are available online for free. You can easily download all the documents as PDF.
Page 1
USER MANUAL
C49HG90DM*
Gaming Monitor
The color and the appearance may differ depending on the product, and the specifications are subject to change without prior
notice to improve the performance.
The contents of this manual are subject to change without notice to improve quality.
© Samsung Electronics
Samsung Electronics owns the copyright for this manual.
Use or reproduction of this manual in parts or entirety without the authorization of Samsung Electronics is prohibited.
Trademarks other than that...
Page 2
2
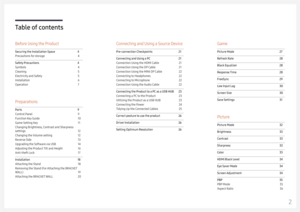
Table of contents
Before Using the Product
Securing the Installation Space 4
Precautions for storage 4
Safety Precautions 4
Symbols 4
Cleaning 5
Electricity and Safety 5
Installation 6
Operation 7
Preparations
Parts 9
Control Panel 9
Function Key Guide 10
Game Setting Key 11
Changing
Brightness , Contrast and  Sharpness
settings 12
Changing the  Volume setting 12
Reverse Side 13
Upgrading the Software via USB 14
Adjusting the Product Tilt and Height 16
Anti-theft Lock 17
Installation 18
Attaching the...
Page 3
3
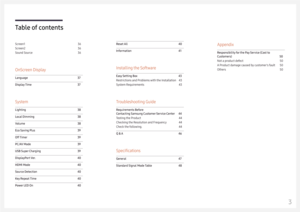
Table of contents
S
creen 1 36
Screen 2 36
Sound S ource 36
OnScreen  D isplay
Language 37
Display  Time 37
System
Lighting 38
Local Dimming 38
V olume 38
Eco  Saving Plus 39
Off  Timer 39
PC/ AV Mode 39
USB  Super  Charging 39
Display Port  Ver . 40
HDMI  Mode 40
Source D etection 40
Key  Repeat Time 40
Power  LED On 40
Reset  A ll 40
Information 41
Installing the Software
Easy Setting Box 43
Restrictions and Problems with the Installation 43
System Requirements 43
Troubleshooting Guide
Requirements...
Page 4
4
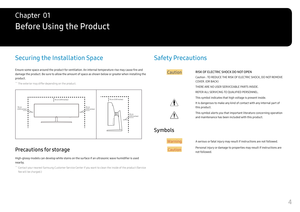
Securing the Installation Space
Ensure some space around the product for ventilation. An internal temperature rise may cause fire and
damage the product. Be sure to allow the amount of space as shown below or greater when installing the
product.
 ―The exterior may differ depending on the product.
10 cm (3.93 Inches)
10 cm
(3.93 Inches) 10 cm
(3.93 Inches)
10 cm (3.93 Inches)
10 cm
(3.93 Inches)
Precautions for storage
High-glossy models can develop white stains on the surface if an ultrasonic wave...
Page 5
5
Cleaning
 ―Take the following steps when cleaning.
1 Power off the product and computer.
2 Disconnect the power cord from the product.
 ―Hold the power cable by the plug and do not touch the cable with wet hands. Otherwise, an electric shock
may result.
3 Wipe the monitor with a clean, soft and dry cloth.
 ‒ Do not apply a cleaning agent that contains alcohol, solvent, or surfactant to the monitor.
 ‒Do not spray water or detergent directly on the product.
4 Wet a soft and dry cloth in water and wring...
Page 6
6
Warning
 •DO NOT PLACE CANDLES, INSECT REPELLANTS OR CIGARETTES ON TOP OF THE PRODUCT. DO NOT
INSTALL THE PRODUCT NEAR HEAT SOURCES.
 •Do not install the product in poorly ventilated spaces such as a bookcase or closet.
 •Install the product at least 10cm away from the wall to allow ventilation.
 •Keep the plastic packaging out of the reach of children.
 ‒Children may suffocate.
 • Do not install the product on an unstable or vibrating surface (insecure shelf, sloped surface, etc.)
 ‒The product may...
Page 7
7
Warning
 •There is a high voltage inside the product. Never disassemble, repair or modify the product yourself.
 ‒Contact Samsung Customer Service Center for repairs.
 • To move the product, first disconnect all the cables from it, including the power cable.
 •If the product generates abnormal sounds, a burning smell or smoke, disconnect the power cord
immediately and contact Samsung Customer Service Center.
 •Do not let children hang from the product or climb on top of it.
 ‒Children may become...
Page 8
8
Caution
 •Leaving the screen fixed on a stationary image for an extended period of time may cause afterimage
burn-in or defective pixels.
 ‒Activate power-saving mode or a moving-picture screen saver if you will not be using the product
for an extended period of time.
 • Disconnect the power cord from the power socket if you do not plan on using the product for an
extended period of time (vacation, etc).
 ‒Dust accumulation combined with heat can cause a fire, electric shock or electric leakage.
 •...
Page 9
9
Preparations
Chapter  02
Parts
Control Panel
 ―The color and shape of parts may differ from what is shown. Specifications are subject to change without
notice to improve quality.
Function Key Guide Power LED
LEFT JOG Button RIGHT
UP(REAR)
DOWN(FRONT)
PRESS(ENTER)
Return
Game Setting Key
Parts
Description
JOG ButtonMulti directional button that helps navigate. ―
The JOG button is located at the bottom right side of the screen and has
5 directions of UP, DOWN, LEFT, RIGHT, and PRESS (ENTER).
Power LED...
Page 10
10
Function Key Guide
 ―To enter the main menu or to use other items, press the JOG button to display the Function Key Guide. You
can exit by pressing the JOG button again.
Return  UP/DOWN/LEFT/RIGHT: Move to the item you want. The
description for each item will appear when the focus changes.
PRESS(ENTER): The selected item will be applied.
Icons
Description
MenuSelects  by moving the JOG button in the function key guide screen.
The OSD (On Screen Display) of your Monitor’s feature appears....


