Philips Htr5000 User Manual
Here you can view all the pages of manual Philips Htr5000 User Manual. The Philips manuals for Home Theater System are available online for free. You can easily download all the documents as PDF.
Page 1
DIGITAL  A/V SURROUND RECEIVER
User manual
Thank you for choosing Philips.
Need help fast?
Read your Quick-Use Guide and/or User Manual first for quick
tips that make using your Philips product more enjoyable.
If you have read your instructions and still need assistance,
you may access our online help at www.philips.com/support
HTR5000
Page 2
2
8239 300 38591
Important notes for users in the
U.K.
Mains plug
This apparatus is fitted with an approved 13
Amp plug.  To change a fuse in this type of plug
proceed as follows:
1Remove fuse cover and fuse.
2Fix new fuse which should be a BS1362 5
Amp, A.S.T.A. or BSI approved type.
3Refit the fuse cover.
If the fitted plug is not suitable for your socket
outlets, it should be cut off and an appropriate
plug fitted in its place.
If the mains plug contains a fuse, this should
have a value of 5 Amp. If a...
Page 3
3
English
Français
Español
Nederlands
Italiano Deutsch
8239 300 38591
Manufactured under license from Dolby
Laboratories. “Dolby”, “Pro Logic” and
the double-D symbol are trademarks of
Dolby Laboratories.
Manufactured under license from Digital
Theater Systems, Inc. U.S. Pat. No’s.
5,451,942; 5,956,674; 5,974,380; 5,978,
762;
6,226,616; 6,487,535 and other U.S.
and world-wide patents issued and
pending.  “DTS” and “DTS Digital
Surround” are registered trademarks of
Digital Theater Systems, Inc....
Page 4
English
4
8239 300 38591
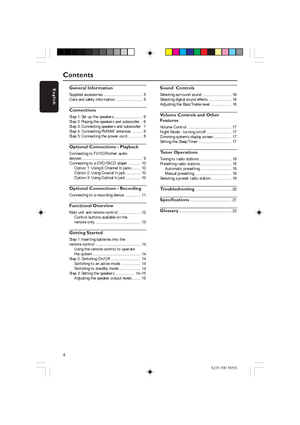
General Information
Supplied accessories ............................................ 5
Care and safety information .............................. 5
Connections
Step 1: Set up the speakers ................................ 6
Step 2: Placing the speakers and subwoofer .. 6
Step 3: Connecting speakers and subwoofer 7
Step 4: Connecting FM/MW antennas ............ 8
Step 5: Connecting the power cord ................ 8
Optional Connections - Playback
Connecting to TV/VCR/other audio...
Page 5
English
5
8239 300 38591
Supplied accessories
General Information
Audio cables
(red, white)
Coaxial cable
FM wire antenna
MW loop antenna
Remote control and
two batteries
Power cable
Speaker brackets
and screws
Care and safety information
Av oid high temperatures, moisture,
water and dust
–A pparatus shall not be exposed to
dripping or splashing.
– Do not place any sources of danger on
the apparatus (e.g. liquid filled objects,
lighted candles).
Do not block any ventilation
openings
– Place the apparatus...
Page 6
English
6
8239 300 38591
Connections
11
33
2
4
2
Step 2: Placing the speakers
and subwoofer
Front Speaker
(Left)Front Speaker
(Right) AV Receiver
SubwooferRear speaker
(Right) Rear speaker
(Left)Centre
speaker
You can choose to hang the speakers on
the wall.  Attach the supplied bracket
firmly to the rear of speakers using the
supplied screws.  Then mount a screw
(not supplied) on the wall where the
speaker is to be hung and hook the
speaker securely onto the mounted
screw.
CAUTION!
You should get a...
Page 7
English
7
8239 300 38591
Step 3: Connecting speakers
and subwoofer
Front Right
Rear Right Rear LeftCentre
Connections
Subwoofer Front Left
●Connect the supplied speaker systems by
matching the colours of the jacks and
speaker cables.  Fully insert the stripped
portion of the speaker wire into the
jacks.
Speakers / Subwoofer   - +FRONT LEFT (FL) black white
FRONT RIGHT (FR) black red
FRONT CENTER (FC) black green
REAR LEFT (RL) black blue
REAR RIGHT (RR) black gray
SUBWOOFER (SUBW) black purple
Helpful...
Page 8
English
8
8239 300 38591
   L              L
R
+ +   SPEAKERS  3
RIGHT
LEFT
REAR RIGHTREAR LEFT FRONT CENTER
SUBWOOFER
6 CHANNEL IN
COAXIAL IN
COAXIAL OUT
OPTICAL IN
AUX TV
IN                        OUT
AUDIOANTENNA
MW
(75    )FM
2
➠
1
                             OUTCOAXIAL OUT
FM
antenna
MW
antenna fix the claw into
the slot
Step 4: Connecting FM/MW
antennasStep 5: Connecting the
power cord
After everything is connected
properly, plug in the AC power cord
to the power outlet.
Never make...
Page 9
English
9
8239 300 38591
IMPORTANT!
–You can connect other audio and audio/visual equipments to this AV receiver
in order to use the Home Cinema Audio System’s surround sound capabilities.
–F or connection to additional components, the audio/video cables are not
supplied.
– When making connections, make sure the colour of cables matches the
colour of jacks.
–A lways refer to the instruction manual of the connected equipment to make
an optimal connection.
Optional Connections - Playback
Connecting to...
Page 10
English
10
8239 300 38591
Optional Connections - Playback
OR
Connecting to a DVD/SACD
player
ABC
OR
D
VD/SACD
player
Y ou only need to make
one connection
to your DVD/SACD player from the
f ollowing options, depending on the
capabilities of your DVD/SACD player.
Option 1: Using 6 Channel In jacks
● If your DVD/SACD player has a built-in
multichannel decoder (e.g. Dolby Digital,
DTS) and has 6-channel (multichannel)
output jacks, you may use the audio
cables (not supplied) to connect the AV
r eceiver’s...


