Lenovo A3600d Manual
Here you can view all the pages of manual Lenovo A3600d Manual. The Lenovo manuals for Telephone are available online for free. You can easily download all the documents as PDF.
Page 2
Basics
Before  using this information  and the product it supports, be sure  to read  the following:
Quick Start Guide
Regulatory Notice
Appendix
The   Quick Start Guide  and the Regulatory Notice  have been  uploaded to the website at
http://support.lenovo.com.
Home  screen
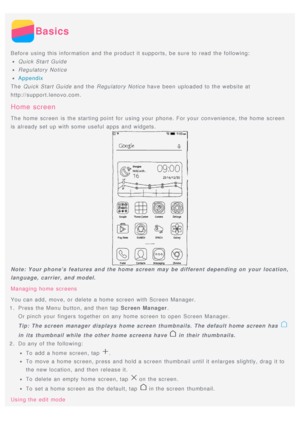
The  home  screen  is  the starting point for using your  phone. For your  convenience, the home  screen
is  already set up with some  useful apps and widgets.
Note: Your phones  features and the home screen  may  be different...
Page 3
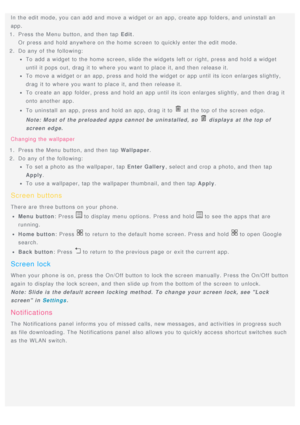
In the edit mode, you can add and move  a widget or an app,  create app folders, and uninstall an
app.
1 .  Press the Menu  button, and then  tap Edit .
Or press  and hold anywhere on the home  screen  to quickly enter the edit mode.
2 .  Do any of the following:
To add a widget to the home  screen, slide the widgets left or right,  press  and hold a widget
until it pops out, drag  it to where  you want to place it, and then  release it.
To move  a widget or an app,  press  and hold the widget or app...
Page 4
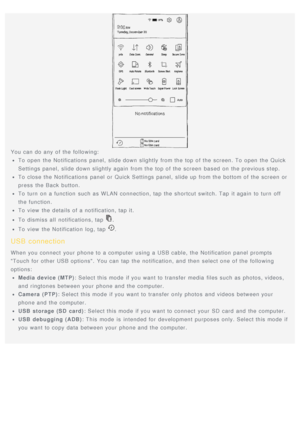
You can do any of the following:
To open  the Notifications  panel,  slide down slightly from the top of the screen. To open  the Quick
Settings panel,  slide down slightly again  from the top of the screen  based  on the previous step.
To close the Notifications  panel  or Quick Settings  panel,  slide up from the bottom of the screen  or
press  the Back  button.
To turn  on a function  such as WLAN connection, tap the shortcut switch. Tap  it again  to turn  off
the function.
To view  the details of a...
Page 5
Calls
Making  a  call
Dialing a number manually
1 .  Open  the Dialer  app.
2 .  In the Dialer  panel,  tap Dialer  to display the keypad  if necessary.
3 .  Enter the phone number that you want to dial, and then  tap
.
Calling from the call  log
1 .  Open  the Dialer  app.
2 .  Tap  the Call Log  tab.
3 .  View the missed,  outgoing, and received calls, and then  tap the entry  that you want to call.
Calling a contact
1 .  Open  the Dialer  app.
2 .  Tap  the Contacts  tab.
3 .  Locate  the contact...
Page 7
Contacts
Creating  a  contact
1.  Open  the Contacts  app.
2 .  Tap
.
3 .  Enter the contact  information.
4 .  Tap   Save .
Searching  for  a  contact
1.  Open  the Contacts  app.
2 .  Do one of the following:
Scroll  the Contacts  list  up or down to locate the desired contact.
Tip: The Contacts list  has  an index along the side  to  help you navigate quickly.  Tap a
letter  to  jump to  a section.
Tap  the search  box, and then  enter the first few letters  of the contact  name.
Deleting  a...
Page 8
Messaging
Sending  a  message
You can use the Messaging app to send text messages and multimedia messages.
1 .  Open  the Messaging  app.
2 .  Tap
.
3 .  Tap  the recipient text box, and then  enter a contact  name  or phone number. Matching contacts
are  displayed  as you type. Select a contact.
Or tap
 to add more recipients.
4 .  Tap  the message text box, and then  enter a message.
Tip: If you want to  send a multimedia message, tap
 to  select a media object  type such as
pictures or video...
Page 9
Camera
Camera  basics
You can use the Camera app to take photos  and record videos.
Tap   to choose  a camera mode.
Tap   to take a photo.
Tap   to record a video.
Tap  the photo  or video thumbnail to view  the photo  or video in the Gallery  app.  For more
information,  see Gallery .
Tap   to choose  a shot mode.
Tap   to choose  a flash mode.
Tap   to use HDR (High Dynamic Range).
Tap   to switch between the front -facing camera and the rear-facing camera.
Tap   to configure the other camera...
Page 10
Gallery
Viewing  photos  and  videos
1.  Open  the Gallery  app.
2 .  Tap  an album.
By default, photos  and videos are  grouped together by album.  If you want to view  photos  or
videos in a timeline  view, tap
, and then  select Time .
3 .  Tap  a photo  or video to view  it in full screen  mode.
4 .  Do any of the following:
To see the next or previous photo  or video, swipe left or right.
To zoom  in or out of a photo, stretch  or pinch the photo. When you zoom  in, you can drag  to
see other parts...


