Dell 1133 User Guide
Here you can view all the pages of manual Dell 1133 User Guide. The Dell manuals for Printer are available online for free. You can easily download all the documents as PDF.
Page 1
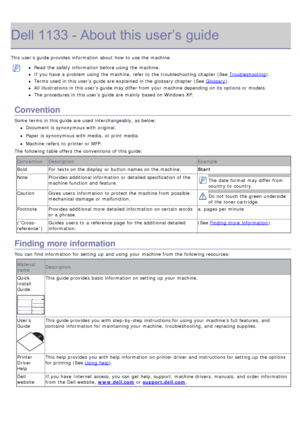
Dell 1133 - About this user’s guide
This user’s guide provides  information  about  how to  use the machine.
Read  the safety information  before using  the machine.
If  you have  a  problem using  the machine,  refer to  the troubleshooting  chapter (See Troubleshooting).
Terms used in this user’s guide are explained in the glossary chapter (See Glossary).
All illustrations in this user’s guide may differ from  your  machine depending on its  options or models.
The  procedures in this user’s guide are...
Page 2
Troubleshooting
This chapter gives  you different troubleshooting  steps.
This chapter includes:
Redistributing toner
Tips for avoiding paper curls
Tips for avoiding paper jams
Clearing paper jams
Understanding display  messages
Solving  other problems
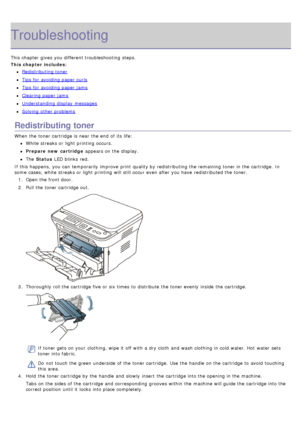
Redistributing toner
When  the toner cartridge is near  the end  of its  life:
White streaks or light  printing occurs.
Prepare  new  cartridge appears on the display.
The  Status  LED blinks  red.
If  this happens,  you can  temporarily improve  print...
Page 3
5.  Close  the front door. Ensure  that  the cover is securely closed.
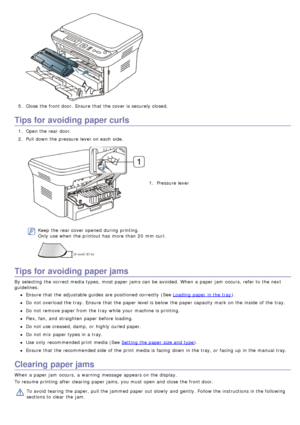
Tips for avoiding paper curls
1.  Open the rear door.
2 .  Pull down  the pressure  lever on each  side.
1.  Pressure lever
Keep  the rear cover opened  during printing.
Only use when  the printout has  more  than  20  mm  curl.
Tips for avoiding paper jams
By  selecting  the correct media types,  most paper jams  can  be avoided.  When  a  paper jam  occurs,  refer to  the next
guidelines.
Ensure  that  the adjustable guides  are...
Page 4
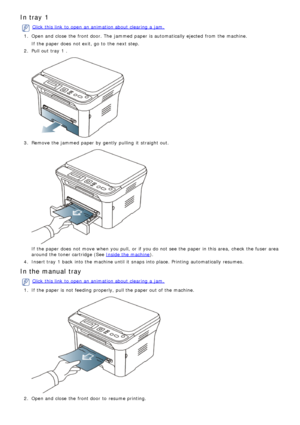
In tray 1
Click  this link  to  open an animation about  clearing  a  jam.
1 .  Open and  close  the front door. The  jammed  paper is automatically ejected  from  the machine.
If  the paper does  not exit, go to  the next step.
2 .
Pull

 out tray
 1
  .
3.  Remove the jammed  paper by gently  pulling  it  straight out.
If  the paper does  not move  when  you pull,  or if you do not see the paper in this area,  check  the fuser  area
around  the toner cartridge (See
Inside the machine ).
4 .
Insert...
Page 5
Inside the machine
Click  this link  to  open an animation about  clearing  a  jam.
The  fuser  area is hot. Take care when  removing paper from  the machine.
1 .  Open the front door  and  pull the toner cartridge out, lightly pushing  it  down.
2.  Remove the jammed  paper by gently  pulling  it  straight out.
3.  Replace the toner cartridge and  close  the front door. Printing  automatically resumes.
In exit area
Click  this link  to  open an animation about  clearing  a  jam.
1 .  Open and  close...
Page 6
1.  Pressure lever
If  you do not see the jammed  paper, go to  next step.
5 .  Pull the fuser  cover levers  down  and  remove the paper.
Return the fuser  cover levers  to  their original position.
The  fuser  area is hot. Take care when  removing paper from  the machine.
6 .  Return the pressure  levers  to  their original position.
7 .  Close  the rear door.
8 .  Open and  close  front door, printing automatically resumes.
Understanding display messages
Messages appear on the control panel display...
Page 7
life,  which indicates  the average capacity
of print -outs and  is designed pursuant to
ISO/IEC 19752
 (See
Available  supplies ).
The  number of pages may be affected by
operating  environment, printing interval,
media type, and  media size.  Some
amount  of toner may remain  in the
cartridge even when  End  of  life
Replace new  cart  appears and  the
printer stops printing.
Error  [error
number]
Turn  off
then on A  systematic error has  occurred
Reboot  the power and  try the printing job again....
Page 8
be guaranteed.
Replace the toner cartridge for the best print  quality
when  this message  appears.  Using a  cartridge beyond
this
 stage can  result
 in
  printing quality issues (See
Replacing  the toner cartridge ).
Dell does  not recommend  using  non-genuine Dell
toner cartridge such as refilled or remanufactured.
Dell cannot guarantee  non-genuine Dell toner
cartridges  quality.  Service  or repair  required  as a
result  of using  non-genuine Dell toner cartridges
will not be covered under the...
Page 9
Multiple sheets  of paper do
not feed.Different types of paper may be stacked  in the tray. Load paper of only  one  type, size,
and  weight.
Paper  does  not feed into
the machine.
Remove any obstructions from  inside  the machine.
Paper  has  not been  loaded correctly. Remove paper from  the tray  and  reload it
correctly.
There is too  much  paper in the tray. Remove excess  paper from  the tray.
The  paper is too  thick.  Use  only  paper that  meets the specifications required  by
the machine (See...
Page 10
space  of the computer  is
insufficient to  access  the
print  job.
The  output tray  is full.Once the paper is removed from  the output tray, the
machine resumes  printing.
The  machine selects
print  materials from  the
wrong  paper source. The  paper option that
was  selected in the
Printing Preferences
may be incorrect. For  many software applications, the paper source selection is
found  under the Paper  tab within  the Printing Preferences
.
Select the correct paper source.  See the printer driver...


![Page 7
life, which indicates the average capacity
of print -outs and is designed pursuant to
ISO/IEC 19752
(See
Available supplies ).
The number of pages may be affected by
operating environment, printing interval,
media type, and media size. Some
amount of toner may remain in the
cartridge even when End of life
Replace new cart appears and the
printer stops printing.
Error [error
number]
Turn off
then on A systematic error has occurred
Reboot the power and try the printing job again.... Page 7
life, which indicates the average capacity
of print -outs and is designed pursuant to
ISO/IEC 19752
(See
Available supplies ).
The number of pages may be affected by
operating environment, printing interval,
media type, and media size. Some
amount of toner may remain in the
cartridge even when End of life
Replace new cart appears and the
printer stops printing.
Error [error
number]
Turn off
then on A systematic error has occurred
Reboot the power and try the printing job again....](http://img.usermanuals.tech/thumb/19/56891/w300_dell_1133-user-guide-6.png)


