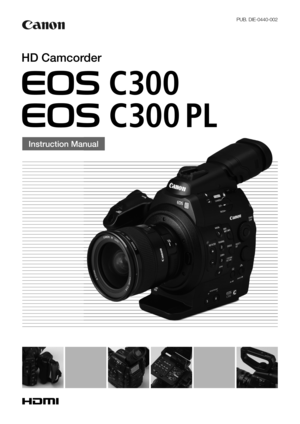
Canon cinema EOS C300 PL User Manual
Here you can view all the pages of manual Canon cinema EOS C300 PL User Manual. The Canon manuals for Cinema are available online for free. You can easily download all the documents as PDF.
Page 2
2
Important Usage Instructions
WARNING
TO REDUCE THE RISK OF FIRE OR ELECTRIC SHOCK, DO NOT EXPOSE THIS PRODUCT TO RAIN OR
MOISTURE.
Apparatus shall not be exposed to dripping or splashing and no objects filled with liquids, such as vases,
shall be placed on the apparatus.
TO REDUCE THE RISK OF ELECTRIC SHOCK, DO NOT EXPOSE THIS PRODUCT TO DRIPPING OR
SPLASHING.
WARNING
TO REDUCE THE RISK OF ELECTRIC SHOCK AND TO REDUCE ANNOYING INTERFERENCE, USE THE
RECOMMENDED ACCESSORIES ONLY.
COPYRIGHT WARNING...
Page 3
3
Only for European Union and EEA (Norway, Iceland and Liechtenstein)These symbols indicate that this product is  not to be disposed of with your household
waste, according to the WEEE Directive (2012/19/EU), the Battery Directive (2006/66/EC)
and/or national legislation implementing those Directives.
If a chemical symbol is printed beneath the symbol shown above, in accordance with the
Battery Directive, this indicates that a heavy metal (Hg = Mercury, Cd = Cadmium, Pb = Lead) is present in
this...
Page 4
4
Important Safety Instructions
CAN ICES-3(B)/NMB-3(B)
In these safety instructions the word “apparatus”
refers to the Canon HD Camcorder EOS C300 / EOS
C300 PL and all its accessories.
1. Read these instructions.
2. Keep these instructions.
3. Heed all warnings.
4. Follow all instructions.
5. Do not use this apparatus near water.
6. Clean only with dry cloth.
7. Do not block any ventilation openings. Install in accordance with the manuf acturer’s instructions.
8. Do not install near an y heat sources...
Page 5
5
Highlights of the EOS C300/C300 PL
The Canon HD Camcorder EOS C300/C300 PL has been designed to meet the demanding needs and highest
expectations of industry professionals. The following are just some of the many features that will help turn your
creative vision into reality.
HD Recording
Large Super 35mm CMOS sensor and DIGIC DV
III image processor
The camcorder is equipped with a large Super
35mm CMOS sensor that  captures video at an
effective pixel count of 8.29 megapixels
(3840x2160)....
Page 6
6
Custom picture settings
With custom picture settings (A114), you can enjoy
unparalleled image control to deliver the “look” you
want by adjusting parameters, such as gamma and
sharpness. The custom pi cture settings can be
recorded onto an SD card, which allows multiple
camcorders to use the same settings, or embedded
in the recording itself.
Canon Log gamma for spectacular dynamic range
You can easily apply the [ / CINEMA Locked] preset
settings, especially designed with professional...
Page 7
7
1. Introduction 11
About this Manual 11Conventions Used in this Manual 11
Supplied Accessories 13
Names of Parts 14 Monitor Unit 19
Grip Unit 21
Handle Unit 21
2. Preparations 23
Preparing the Power Supply 23Using a Battery Pack 23
Using a Power Outlet 25
Turning the Camcorder On and Off 26
Date, Time and Language Settings 27 Setting the Date and Time 27
Changing the Time Zone 27
Displaying the Date and Time while Recording 28
Changing the Language 28
Using the Menus 29 Selecting an Option from the...
Page 8
8
Onscreen Markers and Zebra Patterns 82Displaying Onscreen Markers 82
Displaying Zebra Patterns 83
Setting the Time Code 84 Selecting the Running Mode 84
Selecting Drop or Non-Drop Frame 85
Putting the Time Code Display on Hold 86
Setting the User Bit 87
Synchronizing with an External Device 88 Connecting an External Device 88
Reference Video Signal Input (Genlock  Synchronization) 88
Time Code Signal Input 89
Reference Video Signal Output 90
Time Code Signal Output 90
Recording Audio 91 Connecting an...
Page 9
9
Clip Operations 130Using the Clip Menu 131
Displaying Clip Information 131
Adding  $ Marks or %  Marks 132
Deleting  $ Marks or  % Marks 133
Copying Clips 133
Deleting Clips 134
Deleting the User Memo and GPS  Information 134
Copying a Custom Picture File Embedded in a  Clip 135
Displaying an Index Screen of Shot Marks 135
Displaying a Frame Index Screen of a Single  Clip 136
Adding Shot Marks 137
Deleting Shot Marks 137
Changing a Clip’s Thumbnail 138
6. External Connections 139
Video Output...


![Page 6
6
Custom picture settings
With custom picture settings (A114), you can enjoy
unparalleled image control to deliver the “look” you
want by adjusting parameters, such as gamma and
sharpness. The custom pi cture settings can be
recorded onto an SD card, which allows multiple
camcorders to use the same settings, or embedded
in the recording itself.
Canon Log gamma for spectacular dynamic range
You can easily apply the [ / CINEMA Locked] preset
settings, especially designed with professional... Page 6
6
Custom picture settings
With custom picture settings (A114), you can enjoy
unparalleled image control to deliver the “look” you
want by adjusting parameters, such as gamma and
sharpness. The custom pi cture settings can be
recorded onto an SD card, which allows multiple
camcorders to use the same settings, or embedded
in the recording itself.
Canon Log gamma for spectacular dynamic range
You can easily apply the [ / CINEMA Locked] preset
settings, especially designed with professional...](http://img.usermanuals.tech/thumb/14/1566/w300_cinema-eos-c300-pl-1478307121_d-5.png)


