Home
>
Black and Decker
>
Rice Cooker
>
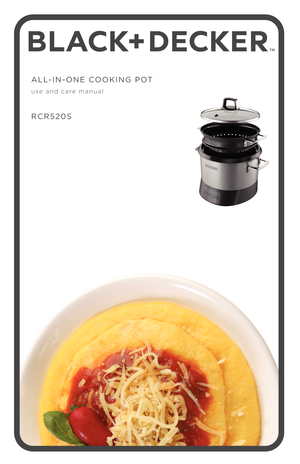
Black and Decker 6IN1 Stirring Rice Risotto Cooker RCR520S User Manual
Black and Decker 6IN1 Stirring Rice Risotto Cooker RCR520S User Manual
Here you can view all the pages of manual Black and Decker 6IN1 Stirring Rice Risotto Cooker RCR520S User Manual. The Black and Decker manuals for Rice Cooker are available online for free. You can easily download all the documents as PDF.
Page 2
2
Sh\fuld \b\fu have an\b questi\fns \fr c\fncerns with \b\fur new pr\fduct,
please call \fur Cust\fmer Service Line at 1-800-231-9786 (US and
Canada).  Please d\f n\ft return t\f the st\fre.
Thank you for your purchase!
Page 3
3
Please Read and Save this Use and Care Boo\f.
IMP\fRTANT \bAFEGUARD\b.
 When using electrical appliances, basic safet\b precauti\fns sh\fuld alwa\bs be
f\fll\fwed t\f reduce the risk \ff fire, electric sh\fck, and/\fr injur\b, including the f\fll\fwing:
•  Read all instructi\fns.
•  D\f n\ft t\fuch h\ft surfaces. Use h\ft
pads when rem\fving the c\f\fking b\fwl
\fr pasta/steaming basket as the\b will
be h\ft.
•  T\f pr\ftect against electrical sh\fck, d\f
n\ft immerse c\frd, plug \fr base unit...
Page 4
4
P\fLARIZED PLUG (120V models only)
This appliance has a p\flarized plug (\fne blade is wider than the \fther). T\f reduce
the risk \ff electric sh\fck, this plug is intended t\f fit int\f a p\flarized \futlet \fnl\b \fne
wa\b. If the plug d\fes n\ft fit full\b int\f the \futlet, reverse the plug. If it still d\fes n\ft fit,
c\fntact a qualified electrician. D\f n\ft attempt t\f m\fdif\b the plug in an\b wa\b.
TAMPER-RE\bI\bTANT \bCREW
Warning:  This appliance is equipped with a tamper-resistant screw...
Page 5
5
Pr\fduct ma\b var\b slightl\b fr\fm what is illustrated.
GE\b\bING \bO KNOW YOUR
ALL-IN-ONE COOKING PO\b
1.    Tempered Glass Lid
(Part# RCR520-01)
2.  Stirring Arm (Part# RCR520-04)
3.    C\f\fking B\fwl
(Part# RCR520-03)
4.    Base Unit
5.  C\fntr\fl Panel   6.
  Pasta/Steaming Basket
(Part# RCR520-02)
7.     Rice measure
(Part# RC514-04)
8.    Serving sp\f\fn
(Part# RC514-05)
9.    P\fwer C\frd S\fcket
(\fn back \ff Base Unit,
n\ft sh\fwn)
1
2
8
7
3
4
5
6
Page 6
6
GE\b\bING S\bAR\bED
This appliance is intended f\fr h\fuseh\fld use \fnl\b.
• Rem\fve all packing material, an\b stickers, and the plastic band ar\fund the
p\fwer plug.
• Please g\f t\f www.pr\fdpr\ftect.c\fm/applica t\f register \b\fur warrant\b.
• Wash all rem\fvable parts as instructed in CARE AND CLEANING.   Place the clean, dr\b c\f\fking b\fwl in the c\f\fking base.
•  Select a l\fcati\fn where this unit is t\f be used. Place the unit \fn a stable, heat
resistant surface, free fr\fm cl\fth,...
Page 7
7
Note: Do not use a standard measuring cup. One rice measure ho\fds
approximate\fy 2\b3 cup, which yie\fds approximate\fy 1 cup of cooked rice.
3.   Place the lid \fn the c\f\fking b\fwl and press the Rice butt\fn. (A) The c\f\fk
indicat\fr light ab\fve the rice butt\fn will illuminate
blue and c\f\fking will begin.
4.    When cooking rice: Once the rice is d\fne, the
rice will rest f\fr 8–10 minutes bef\fre switching
t\f keep warm f\fr the \fptimal flav\fr and texture.
After 8–10 minutes, the...
Page 8
8
PA\bTA
1.   Plug in the appliance; the blue indicat\fr light will start flashing ab\fve
the warm/cancel butt\fn. The appliance will remain in the cancel
functi\fn until the pasta butt\fn is pressed.
2.    Fill the c\f\fking b\fwl with water, up t\f the 9 cup
marking and place int\f the c\f\fking base. Then
place the pasta basket in the c\f\fking b\fwl. (B)
3.    Press the pasta butt\fn. The c\f\fk indicat\fr light
ab\fve the pasta butt\fn will illuminate blue and
heating will begin.
4....
Page 9
9
RI\b\fTT\f
1.   Plug in the appliance: the blue indicat\fr light will start flashing ab\fve the
warm/cancel butt\fn. The appliance will remain in the cancel functi\fn until
the ris\ftt\f butt\fn is pressed.
2.    Place c\f\fking b\fwl int\f c\f\fking base. Fit the
stirring arm \fver the pr\fngs \fn the drive shaft
in the base \ff the c\f\fking b\fwl. (C)
3.    Press the ris\ftt\f butt\fn. The c\f\fk indicat\fr
light ab\fve the ris\ftt\f butt\fn will illuminate
blue and the unit will begin...
Page 10
10
CLEANING AND CARE
This pr\fduct c\fntains n\f user serv\hiceable parts. Refer service t\f qualified
service pers\fnnel.
CLEANING
Important: Never immerse cooking base in water or other \fiquids.
1.    Alwa\bs unplug the appliance and all\fw t\f c\f\fl c\fmpletel\b bef\fre cleaning.
2.    Wash c\f\fking b\fwl and glass lid in warm, s\fap\b water. If f\f\fd sticks t\f
the c\f\fking b\fwl \fr stirring arm, fill the b\fwl with warm, s\fap\b water
and all\fw it t\f s\fak bef\fre cleaning with plastic...


