Apple imac 21 5 inch late 2009 User Manual
Here you can view all the pages of manual Apple imac 21 5 inch late 2009 User Manual. The Apple manuals for Display are available online for free. You can easily download all the documents as PDF.
Page 2
Apple Inc. © 2010 Apple Inc. All rights reserved. Under the copyright laws, this document may not be copied, in whole or in part, without the written consent of Apple. Every effort has been made to ensure that the information in this document is accurate. Apple is not responsible for printing or clerical errors. Apple 1 Infinite Loop Cupertino, CA 95014-2084 USA + 1 408 996 1010 www.apple.com Apple, the Apple logo, Mac, and Macintosh are trademarks of Apple Inc., registered in the U.S. and...
Page 3
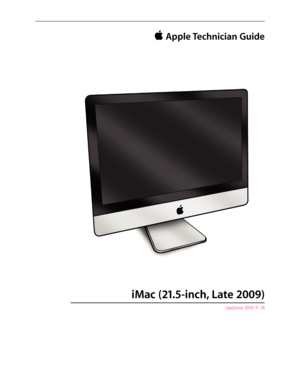
iMac (21.5-inch, Late 2009)
Contents
About This Guide
Updates 9
Updated 18 November 2010  9
Updated 5 March 2010  10
Updated 8 January 2010  10
Updated 24 November 2009  10
Updated 28 October 2009  11
Introduced 20 October 2009  11
Feedback 11
Basics
Overview 13
Identifying Features  13
Product Configurations  14
Wireless Troubleshooting  14
Safety 15
Serial Number Location  16
Troubleshooting
General Troubleshooting  18
Wireless Troubleshooting 18
Update System Software & Firmware  18
Troubleshooting...
Page 4
LED Startup Sequence 25
Logic Board Test Points  26
Sensor and Fan Connector Locations  27
Block Diagram  28
Symptom Charts  29
Startup and Power  29
No Power, Dead Unit  29
Won’t Start Up  31
Intermittent Shutdown  33
Kernel Panic, System Crashes  35
No Video  37
Corrupted Video  39
Burnt Smell/Odor  41
Uncategorized Symptoms  42
Display 43
Backlight Issue/No Backlight  43
Noise / Unstable Flickering  45
LCD Image Issues  47
Incorrect/Missing Colors  48
Distorted/Blurred Image  49
Pixel Anomalies  51...
Page 5
Input/Output Devices 79
Apple Remote Inoperable  79
Audio: Microphone  81
Audio: Built-in Speakers Have Distorted Sound  82
Audio: Built-in Speakers Have No Audio  83
Camera Issues  85
FireWire Device Not Recognized  86
USB Device Not Recognized  88
Wired Keyboard Does Not Function Properly  90
Keyboard: Specific Keys Do Not Respond  92
Wired Keyboard/Mouse Not Recognized  92
Uncategorized Symptoms  94
Mechanical 95
Noise/Hum/Vibration  95
Fan Failures / Thermal Issues  98
Stand/Hinge Issues  99
Physical...
Page 6
Vertical Sync Cable 129
LCD Temp Sensor Cable  130
LVDS Cable  131
Bluetooth Antenna  132
Bluetooth Board  134
AirPort Antenna  136
AirPort Card  138
AirPort Cable  140
AirPort Carrier Board  142
LED Backlight Board  144
Power Supply  146
Backlight Pressure Wall  148
Power Supply Pressure Wall  150
Hard Drive  152
Hard Drive Sensor Cable  155
Bluetooth Cable  157
Camera Cable  160
Optical Drive  163
Optical Drive Sensor Cable  166
Optical Drive Fan  168
SD Card Reader  170
SD Cable  172
Audio Cable  174...
Page 7
Hard Drive Data Cable 189
Optical Drive Data Cable  191
Cable, AC/DC Power/Backlight/SATA  193
CPU Fan  194
Ambient Temp Sensor  197
Left Speaker  199
Right Speaker  201
Hard Drive Fan  203
Mechanism Cover  205
Stand  207
Mechanism  209
Optical Drive Pressure Wall  211
Microphone Cable  213
Rear Housing  214
Views
Exploded Views  217
iMac (21.5-inch, Late 2009), Part 1  217
iMac (21.5-inch, Late 2009), Part 2  218
iMac (21.5-inch, Late 2009), Part 3  219
Screw Chart 220
External Views  222
Front View...
Page 8
© 2010 Apple Inc. All rights reserved. Apple Technician Guide About This Guide iMac (21.5-inch, Late 2009)
Page 9
iMac (21.5-inch, Late 2009) — Updates 9 2010-11-18
Updates
Updated 18 November 2010
SD Board renamed SD Card Reader throughout document.
Troubleshooting
• General Information: Wireless Troubleshooting: added more kBase links.
•  General Information: Common Reset Procedures: rewrote SMC section.
Take Apart
•  General Information:
•  Required Tools: added Thermal paste syringe (Apple part #922-9625) for camera;
•  removed commercial screen cleaning products.
•  Memory: Removal Step 2: added “For better...
Page 10
iMac (21.5-inch, Late 2009) — Updates 10 2010-11-18
Updated 5 March 2010
Take Apart
• Camera: Added screw part number 922-9239.
•  LCD Panel:
•  Step 2: added caution: “Tilt display out no more than 4 inches (10 cm). Pulling display
too far could damage cables or connectors.”
•  Step 3: added reassembly note: “Verify that all cables are firmly seated into connectors.”
•  Vertical Sync Cable: Added reassembly note: “Insert cable securely into connector and
replace all mylar tape.”
Updated 8 January...


