Acer F 20 Ferrari Manual
Here you can view all the pages of manual Acer F 20 Ferrari Manual. The Acer manuals for Monitor are available online for free. You can easily download all the documents as PDF.
Page 1
1
Table of Contents


Precautions .....................................................................................................................2
Package contents ............................................................................................................3
Installation instructions .................................................................................................3
Assembling the...
Page 2
2

Precautions


z The monitor may be damaged if placed too near a source of heat. Be aware of the
location of radiators, cookers, open fires etc.
z Do not cover the slots and openings on the back or top of the cabinet as the
monitor requires ventilation. The monitor should be located in a well-ventilated
room to prevent the possibility of overheating.
z Do not allow sharp objects such as knives, pens, or pencils near the screen. If such
objects touch the screen, the LCD panel will be...
Page 3
3

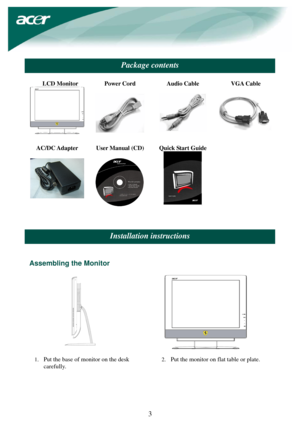
Package contents

LCD Monitor

 Power Cord

 Audio Cable

 VGA Cable

AC/DC Adapter

 User Manual (CD)

Quick Start Guide


Installation instructions


Assembling the Monitor


1. Put the base of monitor on the desk
carefully.
 2.
Put the monitor on flat table or plate.
Page 4
4


Repackage the Monitor

Save the original box and packing material in case you have to ship or transport the monitor.
Repackage the monitor:
1. Unplug the power cord to make sure the power is off.
2. Put the monitor into carton carefully.


Important
To find a clean and flat surface table place the monitor .
To select clean and dry clothes put under the monitor for avoiding scratches.


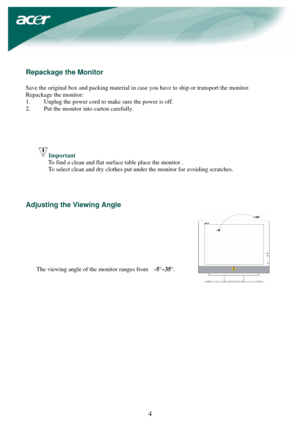
Adjusting the Viewing Angle


The viewing angle of the monitor ranges...
Page 5
5  Connecting the Devices

Caution: Make sure that the computer and the monitor are both disconnected from the
power supply.

c
AC/DC Adapter
With power cord Connect the plug of the AC/DC adapter to the (DC IN ) socket of the
monitor , then be insert the power cord into the adapter and a properly
grounded electric socket.
d
VGA Cable    Connect the signal cable to the VGA input socket (VGA IN) of the
monitor , and connect the signal cable to the VGA output socket of the
graphics card...
Page 6
6


Adjusting display settings


External Controls
´1

POWER Power on/off
Blue: power on
Orange: in sleep mode
´2

OSD
Function Press to view OSD.
If OSD is active, press to exit a selection in OSD.

´3

UP/ PLUS If OSD is active, press to select or adjust OSD options. If OSD is
inactive, press once, then press the buttons marked        or        to
adjust the volume.
´4  DOWN /
MINUS If OSD is active, press to select or adjust OSD options. If OSD is
inactive, press...
Page 7
7
OSD options

Please refer to External Controls on Page 6.
To adjust the OSD settings:
1. Press the MENU button to open the OSD main menu.
2. Use the buttons marked    or    , to select the menu option you want.
3. Press AUTO button to highlight a control, and then press    or    to adjust
the option
setting.

4. Press the MENU button to return to the previous menu option or exit the OSD.

OSD Menu


Picture

Brightness:
This adjusts the brightness of the picture on the...
Page 8
8


Audio
Vo l u m e : Adjusts the  volume.

Mute : on /off


 Options
Auto Config. :
System runs auto-configuration.

Wide mode : Wide / Normal

Information:
This shows brief information on the screen.

Reset:
Recall to default settings.


 Settings
OSD H. Position
OSD V. Position
OSD Time-out
This changes the position of the OSD window on the screen and
staying time.

Language:

Select the OSD menu language from
English, French, German, Italian, Spanish,...
Page 9
9

Troubleshooting


Problems Possible Solutions
Power LED is not
ON • Check to see if the power switch is in the ON position.
• Ensure that the Power Cord is connected.
No Picture
• Check to see if the power switch is in the ON position.
• Ensure that the Power Cord is connected.
• Ensure the video cable is securely connected to the back of the monitor
and the computer.
• Move the mouse or press any key on the keyboard to bring the monitor
out of active off mode.
Picture shows...
Page 10
10

General specifications

Item Specification
LCD Panel
Display  20.1-inch Flat panel active-matrix TFT LCD
Max resolution  WSXGA+ 1680×1050 pixels
Pixel Pitch  0.258 mm
Color 16.7M
Brightness  300 cd/m² (Typical)
Contrast Ratio 800:1 (Typical)
Response Time  8ms (GTG)
View Angle of Horizontal  176°(Typical)
View Angle  of Vertical  176°(Typical)
External Controls
Power Button  ON/ OFF
Control Buttons  MENU /    /    / AUTO
OSD Function
Picture Contrast / Brightness /Focus /...


